the best USA pharmacy halesaesthetic.com/wp-content/uploads/2025/12/wiki/wiki-cephalexin.html
http://b-nutritious.com/videos/wiki/wiki-clonidine.html no prescription with fast delivery drugstore
prescription with fast delivery drugstore
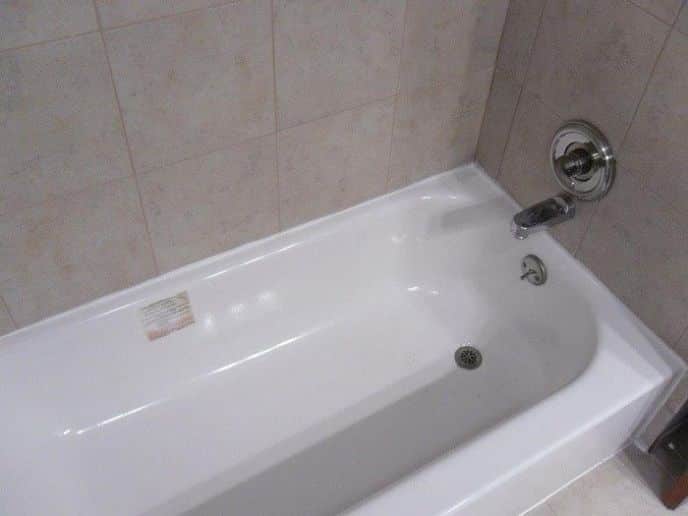
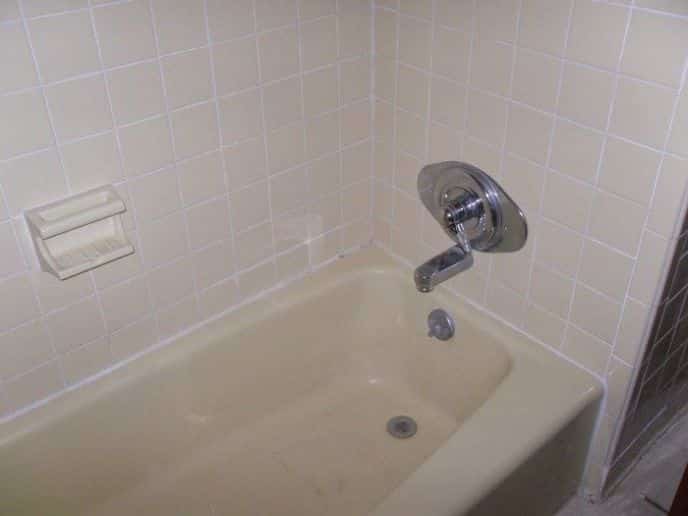
remodeled our bathroom on this post and changed out our big old yellow cast iron bathtub for
new BootzCast bathtub.
Read through the process to find out how we replaced our old bathtub with the new BootzCast tub.
The Bootzcast Tub Review
Choosing Bootzcast
How did we choose the BootzCast Tub?
We were shopping online and saw both the regular Bootz tub and the Bootzcast Bathtub.
Both seemed nice, the Bootzcast was about $100 more expensive and we wondered if it was really worth the extra hundred bucks.

Tapping your fingernails on the regular Bootz tub sounds really tinny. It sounded like rain hitting a piece of sheet metal, very loud.
Then we tapped our fingernails on the Bootzcast tub, thunk — thunk. It sounded much, much more solid and did not make a tin sound.
It was obvious that the Bootzcast with the coating on the bottom was the one we were going to get.
The other big difference is the Bootzcast Tub has a leveling pad on the bottom side of the bathtub.
There is no need for a mortar bed!
This saves you some time and material, especially if you’ve never done a mortar bed before.
This makes it a perfect tub for a do it yourselfer!
We found this tub solid, sturdy, and easy to install. It’s very quiet and the slip resistant coating is nice.
I don’t think you can go wrong, especially considering the price – it’s a cost effective alternative to a cast iron tub – and weighs a lot less!
Other Reviews I Read…
Some of the reviews for the Bootzcast bathtub said the bottom slip resistant area of the tub felt like sandpaper.
The bottom does have a different feel than you might be used to, and to the hand it may feel like a super-fine grit sand paper, but it’s very nice to stand on in the tub, non-slip for sure and easy on the feet.
Another review said the surface scratched easily during construction.
We did not have any problems with the surface scratching during construction.
We did take proper precautions when installing the cement board, mortar, tile, grout etc..
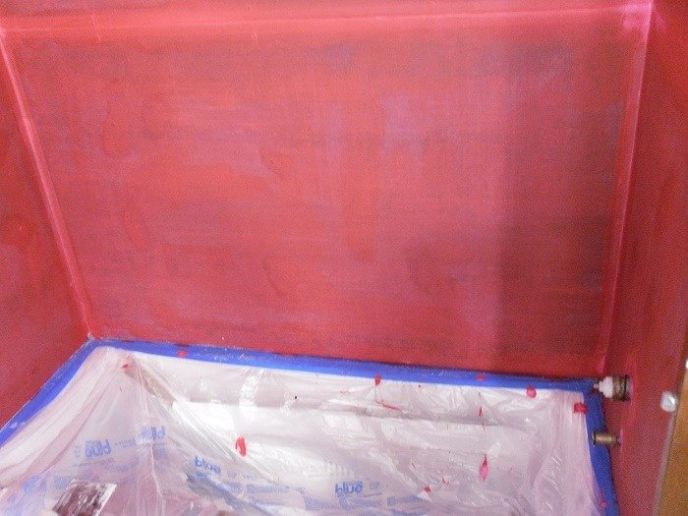
We laid cardboard in the bottom of the tub, cutting it so it would extend up the back rest and put another piece of cardboard folded over the edge of the tub.
On top of that we taped plastic to the edge of the tub all the way around and the plastic went over the cardboard, so anything that dropped into the tub would go down the plastic into the cardboard, not onto the tub surface.
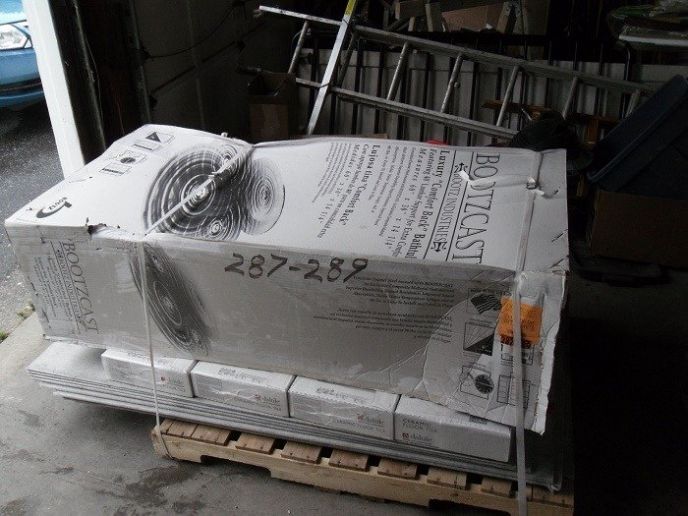
How we used the cardboard box that the tub came in to protect the tub during construction…

Below you can see the protective plastic we used to protect the tub.
Bootzcast Bathtub Installation
For our project, we bought everything online, including tile, grout, thinset, the vanity, wonderboard, sheetrock etc.. and used the store pick up option.
Then called the pro desk to arrange for shipping. It was very easy and very convenient.
Demo
We started by removing the walls surrounding the bathtub.
We were planning on tiling the wall surround anyways, and besides that – the house was built in 1965 and apparently they didn’t use cement backer board then.
So, we removed the old tile and sheetrock and prepared to remove the tub.
I tried to lift the tub by one side….oof. Yup, cast iron! It was heavy!
There was no way we were taking it out in one piece by ourselves.
So, we got out the sledge hammer and started whacking it.
We used eye protection and also slung an old large bathmat over the area I was hitting with the sledgehammer.
Some people said to use a tarp or something similar. It’ll help prevent shards of porcelain from flying into your skin!
It took several hours, including removing the walls surrounding the tub, and two sledge hammers (yup I broke one in the process!) but we finally got it out!
The stamping on the bottom of the tub said “325 lbs”….
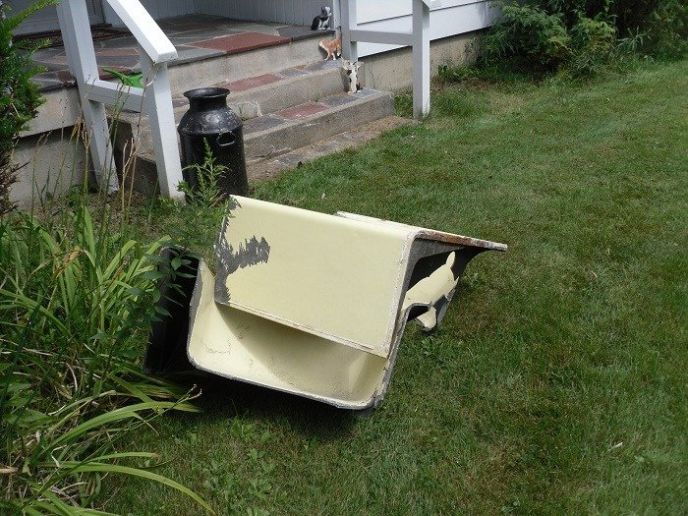
Don’t worry, we didn’t leave it on the lawn 😉 .
We put it in the garage until the scrap guy came to get it. Aside from having done it ones self, I don’t think anyone can appreciate the relief of finally getting a cast iron tub out of the bathroom.
It was certainly not easy, or fun!
TIP: Get rid of your old cast iron tub quickly. Post an ad on craigslist or in a local Facebook yard sale group. There are scrappers out there who will come take it off your hands!
They make some cash when they bring it to the scrap yard for recycling and you get this 325 pound nightmare out of your face!
We lucked out and only had some water stains under the tub, no mold! WHEW! (after 50 years that’s pretty damn good!) We did clean up the area with the cleaner and inhibitor that we had bought as a ‘just in case’.
Why not use it when you’ve got the walls opened up, right?
Installing the Bootzcast Tub
The installation went very easy and quick for us.
We moved the tub onto a flat surface in the garage and measured up the holes (for the drain and overflow).
It happened that the drain and overflow from the previous tub lined up perfectly, so we didn’t have any plumbing to do there (AWESOME!).
STOP: If you have plumbing to do, do it before you install the tub – unless you can reach it from below or through access panels. Don’t install the tub until the plumbing is ready to hook up. Once you install the tub, you may not have easy (or any) access to the plumbing!
We checked the floor for level, and it was perfectly level.
You know how they say “this house has good bones”? Well, our house has good bones!
Everything is always perfectly level! We love it! If it’s not level, you can use a floor leveling premixed compound, that will help you level out the floor and prepare it for the bath tub.
Next, we measured from the floor to the bottom of the under edge of the backside of the tub.
After measuring the edge we then took the measurement inside, marked out a level line across the studs on the back wall of the tub surround and nailed a 2×4 along that line, making sure everything is perfectly level.
Dropping the tub in was the next step. We slid the tub in and rested the back edge of the tub on the 2×4 brace we installed earlier, wiggled it around and it slipped right into place.
Once in place, we checked it for level 5 or 6 different ways with a 4 foot level – it was perfectly level every-which-way on the first shot! (amazing!)
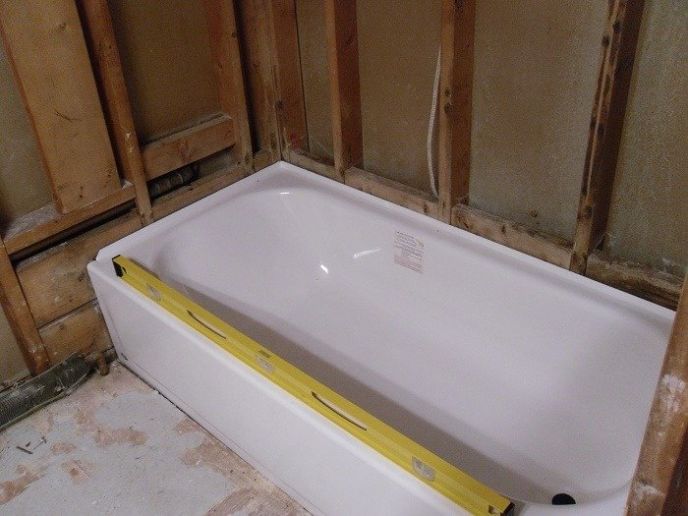


After making sure everything was level, assuring that the tub was sitting firmly on the floor and making full contact with the 2×4 that was nailed to the back wall, we proceeded to lock the tub in place with exterior grade screws and stainless steel washers.
Some people use roofing nails or similar, but we used the screw and washer method.
To lock the tub into place, use the washers and screws to ‘pin’ the lip of the tub to the studs, don’t over tighten, just secure the screws to the studs and make sure the washers are over the lip and securing the tub in place.
If you over tighten, you risk cracking the porcelain, and that’s no good.
If it’s too loose, the tub can slide up and down and that’s not good either.
After locking the tub into place, you can hook up the drains and/or place plastic or something else over the holes to block debris from falling into the drain and overflow during construction.
After getting the tub installed, you’re ready to put the tub surround back together.
You can read more about that in my post about our –> Check out DIY Bathroom Remodel.
I would recommend this tub to friends, family and anyone looking for an affordable, sturdy, easy to install bathtub.
- Like
- Digg
- Del
- Tumblr
- VKontakte
- Buffer
- Love
- Odnoklassniki
- Meneame
- Blogger
- Amazon
- Yahoo Mail
- Gmail
- AOL
- Newsvine
- HackerNews
- Evernote
- MySpace
- Mail.ru
- Viadeo
- Line
- Comments
- Yummly
- Send in Text
- Viber
- Telegram
- Subscribe
- Skype
- Messenger
- Kakao
- LiveJournal
- Yammer
- Edgar
- Fintel
- Mix
- Instapaper
- Copy Link
Hi Chris, It’s a standard depth for a guest bathroom, deep enough for children’s baths. If you’re looking for a bathtub deep enough for adults to bathe, you’re likely looking for what’s called a “soaking tub”. A soaking tub is much deeper.
How much (depth) water can you put in the tub?
We managed ti get the cast iron out….using a pry bar…floor jack …wood and a rolling pin….bathroom size 5×6….no room to swing jack hammer….use leverage eoll on its front side ….take out drywall first …possibly need to cut pipes we didnt.
Just me and my wife( who insisted it could not be done)
Thanks for the info. Thinking about installing a Mauicast 011-3444-00 which is a bit taller. BillyC the bootz website offers a surround called Nextile Z041-5000-00 that works with these tubs.
It was addressed. A regular drain fit fine for us. Beyond that, I suggested you call the manufacturer. I have no idea why your plumbing or drain doesn’t fit.
the question was not addressed. the insualtion between the drain and overflow blocks the drain piping or pushes the plimbing out past hte wall dimensions. it appears you would have to cut a channel in theinsulation to fit the drain.
Hi Andrea! Our tub is still holding up well – no complaints here!!
How is the Bootzcast tub still holding up all these years later? We are looking at one because the weight of a cast iron install is very daunting!!
Hi Jim, we used a regular shoe drain, like this one I’m not sure why yours won’t fit. I’d try calling the tub manufacturer. Sounds strange if the standard one doesn’t fit properly. Sorry I couldn’t be more help!
Where did you get a shoe drain for the tub? Standard shoe drains are too short to get around the thick insulation on the bottom of the tub. I need a taller drain or an extension of some sort.
That is awesome. I wish we could have salvaged our tub. But unfortunately, I the wife and I would never have been able to maneuver it out of the bathroom. Well, some scrapper got it and made a few bucks for it to be recycled — maybe it’s a new lawn ornament somewhere or something! 🙂
My son and I got our old yellow cast iron tub out in one piece. I plan to put it to the curb, someone will pick it up and repurpose it.
Hey Chris, thanks for leaving a comment! Yes, we did the reno almost two years ago now and still have no complaints about the tub. It’s holding up just fine and I don’t have any concerns or foresee any issues. I still recommend the Bootzcast!
The rubberized coating on the bottom seems to be holding up (no tinny sounds from water) and the pad on the bottom which replaces the need for a mortar bed during installation seems to be holding up just fine as well, as there is no flex in the floor of the tub or anything like that.
Hope this helps, good luck with your bathroom renovation!
PS: If you’re tiling your surround and unfamiliar with the process or just curious about our tile work, I did a quick walk through of how we did it, what we used for materials and thing like that here, and a complete overview of our entire project here.
Great write up. I am in the process of a bathroom remodel myself and am trying to find a tub to buy. I plan to tile the surround as well. It seems almost every review I read for a on-cast iron model claim that the quality of the tubs are flimsy. I’ve read reviews on Home Depot about the regular Bootz tub and it too sounded low quality. Your review of the Bootzcast version makes it sound pretty sturdy. I notice your last comment was 18 months ago and am wondering if after all this time have anything negative to say about the tub?
Hi Billy,
I haven’t heard from anyone installing a fiberglass wall kit around a BootzCast, but I don’t see why it wouldn’t work just fine. It sounds like it would go much quicker than tiling process. Good luck!
The BootsCast tub looks and sounds great, but…. Has anyone installed a BootzCast tub with a fiberglass three piece wall kit? I am not interested in the glue to the wall models, but looking for one that is fairly rigid can seal well, and screw to the wall, or studs.. Hints tips, suggestions???
PS: the sledge is the weapon of choice … plus a pair of ear plugs and safety glasses – old one is out and ready for the new!!! 🙂
There’s a first time for everything, and this was my first time installing a tub (and renovating a bathroom). I’m just happy it went as smooth as it did. I didn’t want to screw it up and have to call someone to come fix it, that could be embarrassing. 🙂
Gosh, installing a tub looks like a ton of hard work! I am glad that you are smart/handy enough to handle it. Your directions are awesome, though, if we ever want to try it. 🙂
Ha! Yes, we did break one! It was a wood handled sledge hammer I had for years, the handle broke – at least it didn’t go flying anywhere. It broke on impact, not back-swing! lol
We got the idea for a sledge hammer by searching “How to remove a cast iron bath tub” on youtube. The sledge hammer seems to be the weapon of choice!
Thanks for stopping by, Sharon!! 🙂
love the tips about the sledge hammer! lol You broke one? Bet that wasn’t a blog worthy moment for either of you guys during the process! Great post showing how to install a bathtub! And yes – be very thankful for a house with good bones! We lived in a house a while back where everything was crooked! 🙂
Thanks for stopping by. I hope they’re able to get you a new tub quickly. Good luck with your installation!
Well documented post, thank you. I recently started the installation myself but found the bathtub had a tiny crack on the right side (homedepot too), waiting for the new one now.