Learn how to make wood Halloween jack o’ lanterns today!
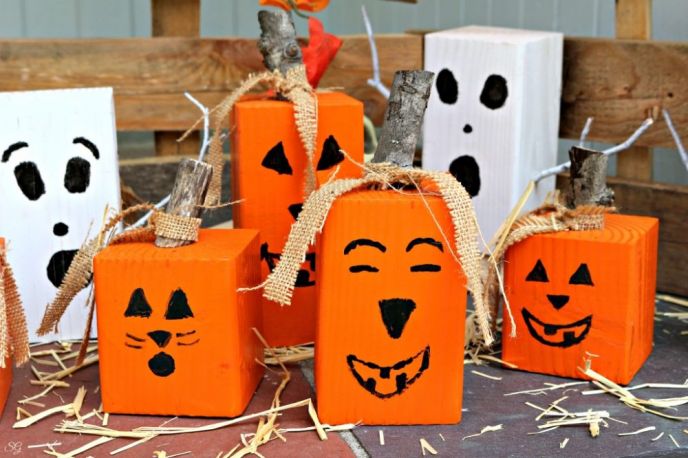
These wood pumpkin crafts are fun, easy to make, and serve two purposes, fall pumpkins and Halloween jack o’ lanterns!
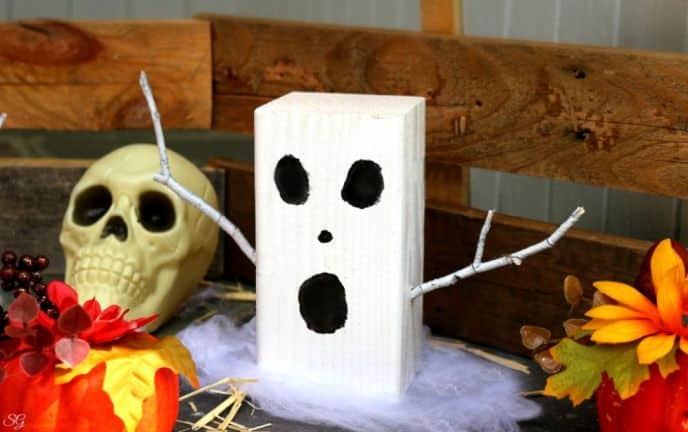
We also made dual use Halloween ghosts!
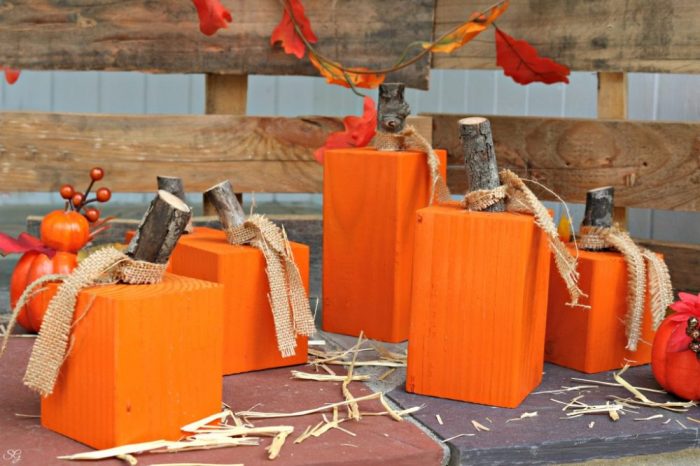
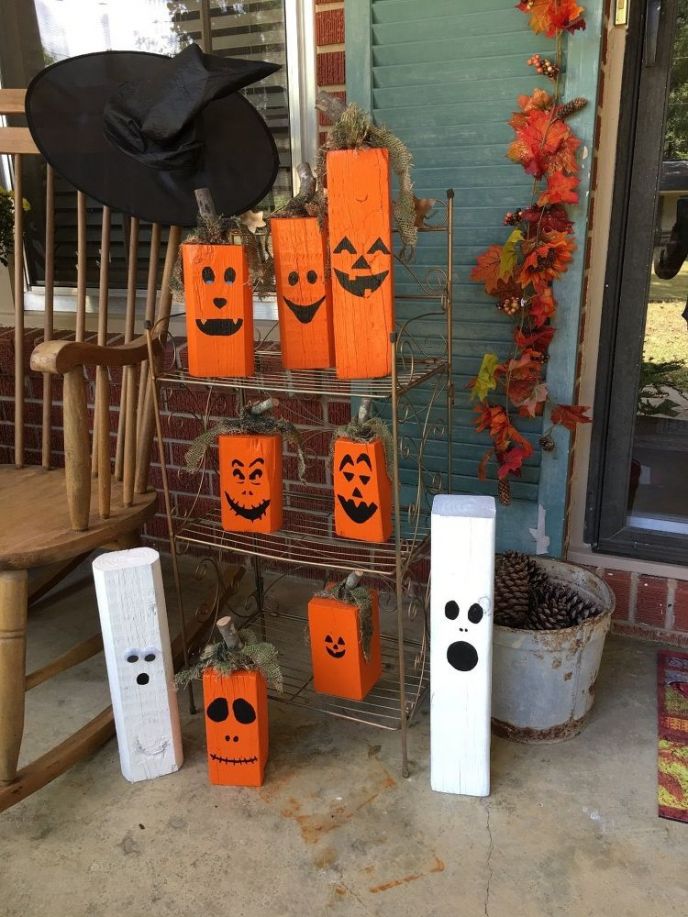
You can put these pumpkins out after labor day for a splash of orange decor and then flip them around as Halloween approaches for a fun wood pumpkin jack o’ lantern decoration!
Once Halloween has passed, turn them back around until it’s time for your winter decorations to make their appearance!
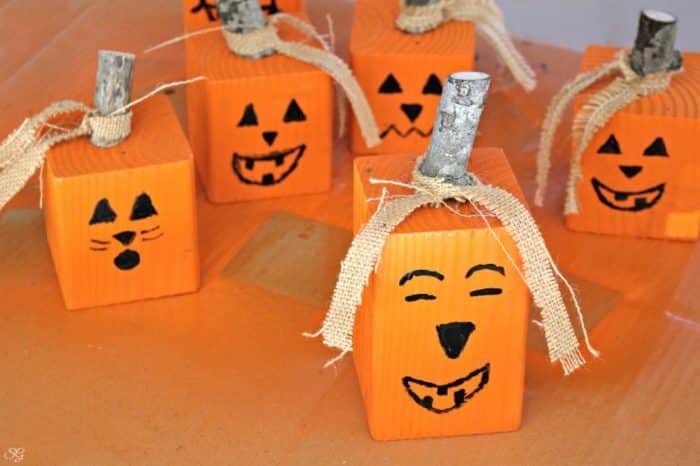
Wood Halloween Jack O Lanterns
These DIY fall wood pumpkin jack o’ lantern craft decorations are quite easy to make and a fun little decoration for your fall and Halloween displays.
We’re making pumpkin decorations that are a perfect addition to your front porch, mantel or even a centerpiece on your table. I’m sure you know exactly where you want to put your pumpkin decorations, so let’s get to it!
Materials:
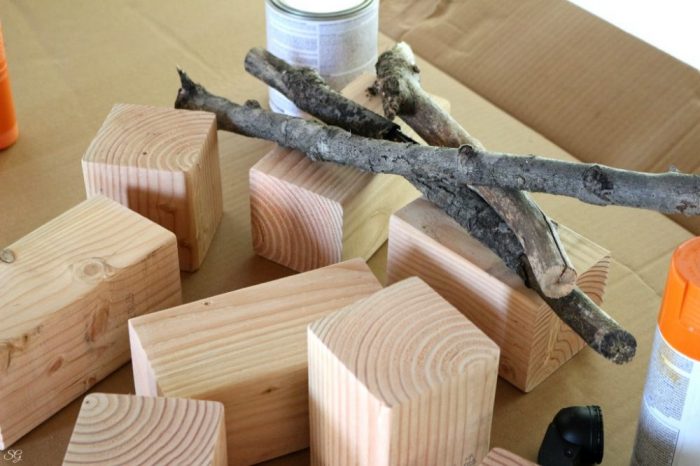
- 4×4 wood blocks, cut to various lengths (mine are 4″ to 7″)
- Orange paint
- Black paint
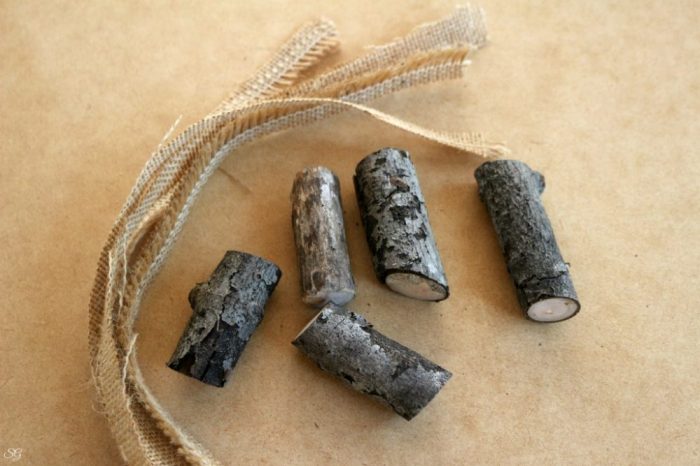
- Tree branches/sticks about 1½” in diameter cut to about 3 inches in length. (Cut the ends at a slight angle)
- Burlap fabric (or ribbon) cut 8 to 12 inches long and 1 inch wide
Directions:
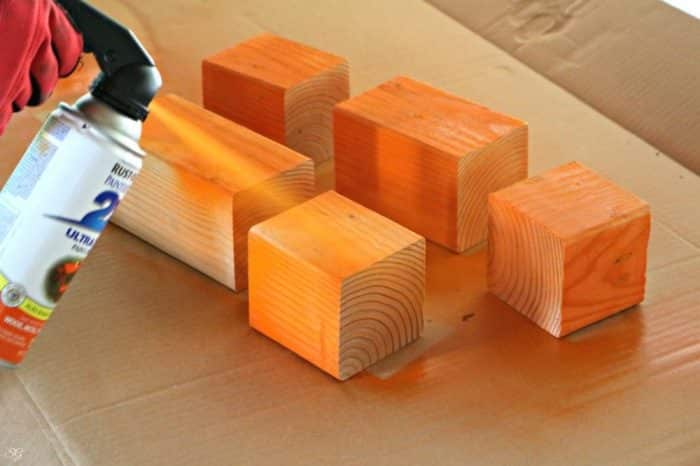
Begin by painting your blocks orange. Paint all sides of your wood blocks.
You don’t need to paint the bottoms of the blocks if you don’t want to, the bottom will not be visible.
While the paint is drying, we’ll cut our sticks to about 3 inches long with the ends at a slight angle.
This is also a good time to cut the burlap into strips.
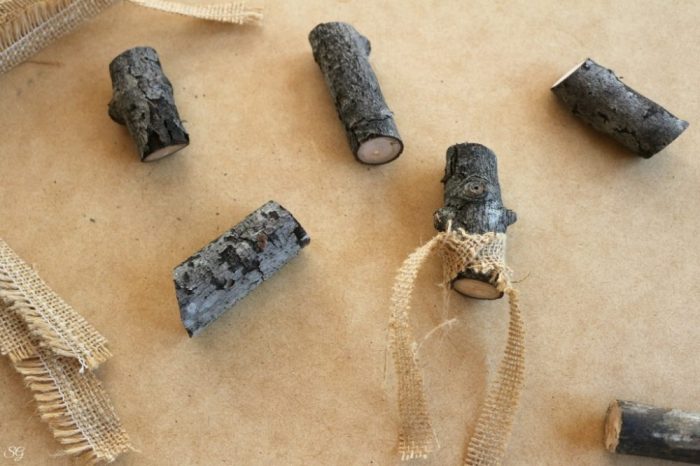
Since the paint isn’t quite dry yet, I’m going to go ahead and tie the burlap around the base of my pumpkin stem wood branches right now – before attaching them to the pumpkins.
amzn_assoc_placement = “adunit0”;
amzn_assoc_search_bar = “false”;
amzn_assoc_tracking_id = “scrappygeekusa-20”;
amzn_assoc_search_bar_position = “top”;
amzn_assoc_ad_mode = “search”;
amzn_assoc_ad_type = “smart”;
amzn_assoc_marketplace = “amazon”;
amzn_assoc_region = “US”;
amzn_assoc_title = “Burlap”;
amzn_assoc_default_search_phrase = “Burlap Fabric”;
amzn_assoc_default_category = “All”;
amzn_assoc_linkid = “39c45263fe2a1cbd72053af4401c47f6”;
amzn_assoc_rows = “1”;
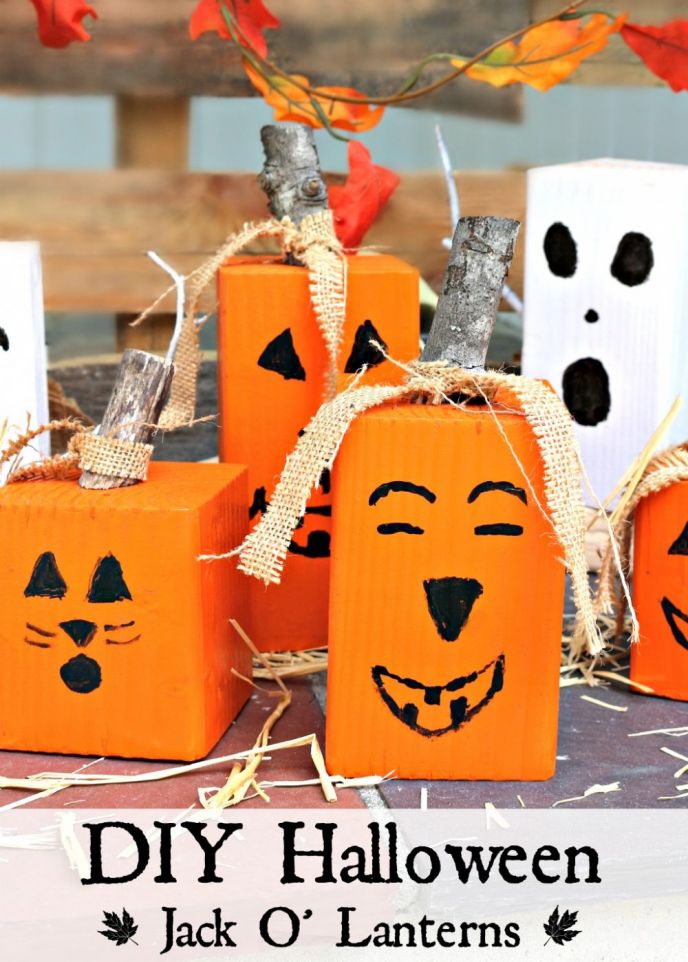
Now we have our pumpkin stems ready to go and our orange paint is completely dry, we can paint on our jack o’ lantern face to one side of the pumpkins!

As you can see, we haven’t painted jack o’ lantern faces on wood blocks before, so we did some testing on the cardboard before committing to the wooden blocks! 🙂
Paint the Halloween jack o’ lantern faces any way you want, we’re using this black paint. Look at some of the finished photos to see if you can spot Katie’s kitty cat jack o’ lantern!
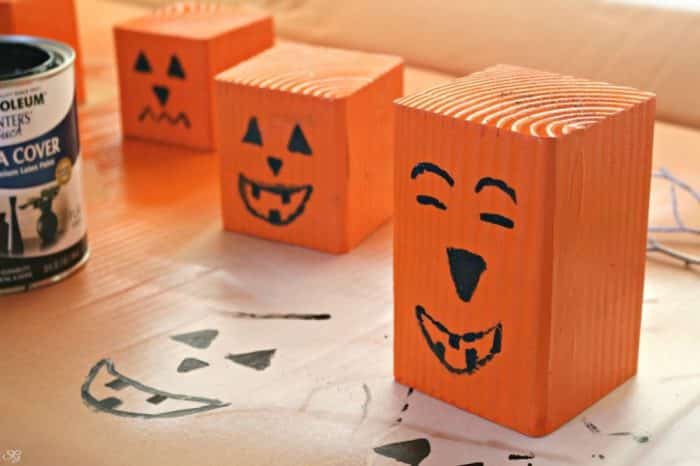
Wait until the Halloween jack o’ lantern faces have dried, when you can move forward without fearing that you’ll smudge the face.
Next, we’re attaching the tree branch/stick stems with burlap tied around them.
Place a dab of wood glue on the bottom of the wood stem and place it in the center of the top of the pumpkin. Use a brad or finish nail to secure the stick to the top while the glue dries.
Alternatively, you can use a piece of painters tape to hold the stem in position while the wood glue dries.
Now you have a jack o’ lantern Halloween decoration piece and if you flip it around, you have a fall pumpkin decoration you can use all season long!

People love these! Did you recreate this project? One of my followers on Hometalk recreated these Halloween Jack O’ Lanterns and shared a photo!
More Halloween Decorations:
- Cheesecloth Ghosts Halloween DIY Tutorial
- Rusty Witch Cauldron DIY Halloween Tutorial
- DIY Halloween Ghost
- Halloween DIY Decoration – BOO Boxes
Halloween Food
- Mummy Pizzas
- Halloween Graveyard Jello Dessert
- Candy Corn Halloween Bark
- Halloween Party Food, DIYs, Games, And More!
- Apple Cookie Crumb Bars
Halloween Fun and Games
- Witch Pitch Halloween Party Game
- Halloween Spider Race Party Game
- Top 10 Halloween Songs for Halloween Parties
How many DIY pumpkins will you put in your pumpkin patch?
amzn_assoc_placement = “adunit0”;
amzn_assoc_search_bar = “false”;
amzn_assoc_tracking_id = “scrappygeekusa-20”;
amzn_assoc_search_bar_position = “top”;
amzn_assoc_ad_mode = “search”;
amzn_assoc_ad_type = “smart”;
amzn_assoc_marketplace = “amazon”;
amzn_assoc_region = “US”;
amzn_assoc_title = “Home Halloween Decorations”;
amzn_assoc_default_search_phrase = “Outdoor Halloween Decorations”;
amzn_assoc_default_category = “All”;
amzn_assoc_linkid = “39c45263fe2a1cbd72053af4401c47f6”;
- Like
- Digg
- Del
- Tumblr
- VKontakte
- Buffer
- Love
- Odnoklassniki
- Meneame
- Blogger
- Amazon
- Yahoo Mail
- Gmail
- AOL
- Newsvine
- HackerNews
- Evernote
- MySpace
- Mail.ru
- Viadeo
- Line
- Comments
- Yummly
- Send in Text
- Viber
- Telegram
- Subscribe
- Skype
- Messenger
- Kakao
- LiveJournal
- Yammer
- Edgar
- Fintel
- Mix
- Instapaper
- Copy Link
Comments are closed.