This shop has been compensated by Collective Bias, Inc. and Breathe Right® Nasal Strips. All opinions are mine alone. #TomorrowStartsTonight #CollectiveBias
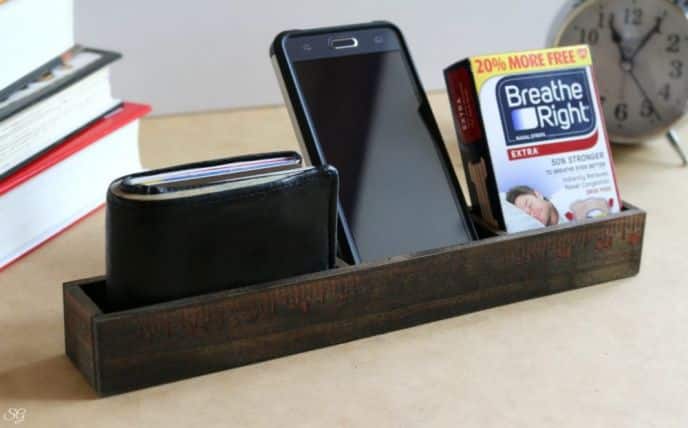
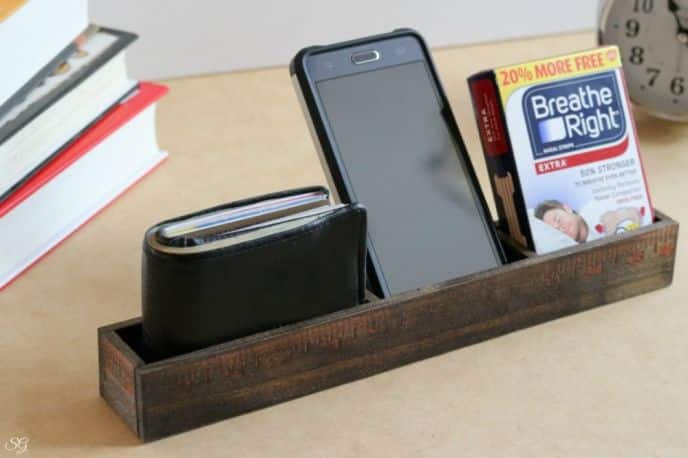
I finally broke down and built a DIY nightstand organizer for myself. As you know, this year has been the year of organization at our house. Perhaps our biggest project this year was our garage organization project. But, one thing I have needed for a while is a nightstand organizer. A place to store a few things at nighttime, and this little DIY organizer fits the bill perfectly.
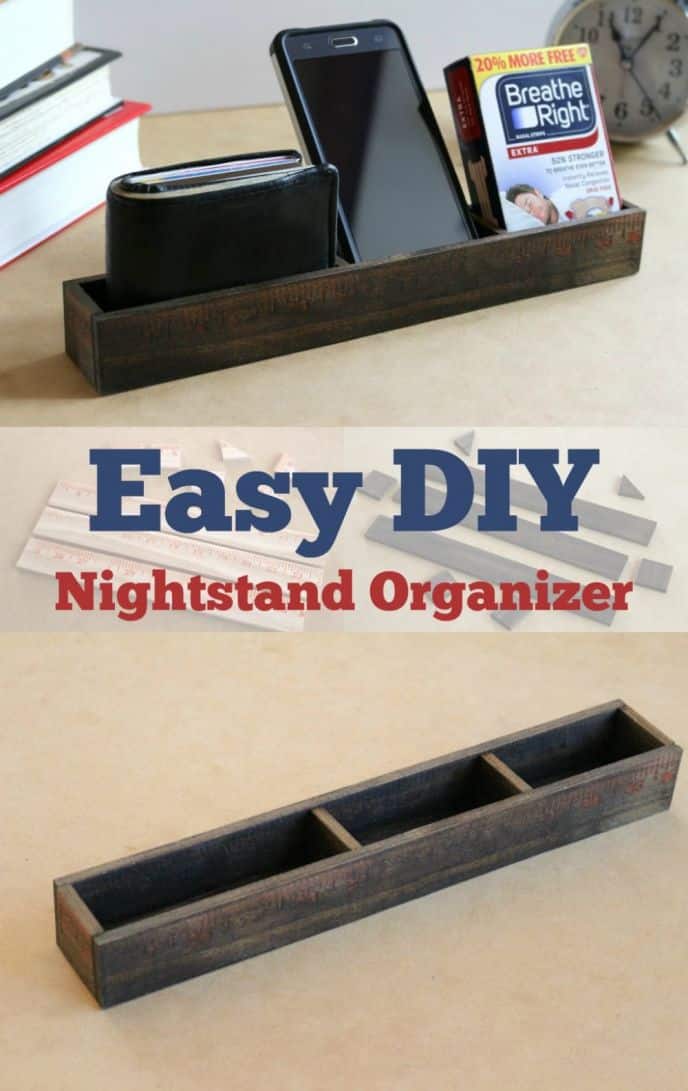
This nightstand organizer only costs a couple of bucks to make, but looks pretty cool if you ask me. I made it by using a couple of inexpensive yardsticks I picked up at the store. I cut them up, stained the pieces and used a wood super glue to assemble it. Very simple, fun and cost effective way to make a little nightstand organizer. It gives me a place to store my things at bedtime, rather than just slung on the nightstand, the dresser or wherever else I fling them for the night. You don’t know how many times I’ve had to search for my wallet. I’m sure you’ve never misplaced your wallet, right? 😉
DIY Rustic Nightstand Organizer
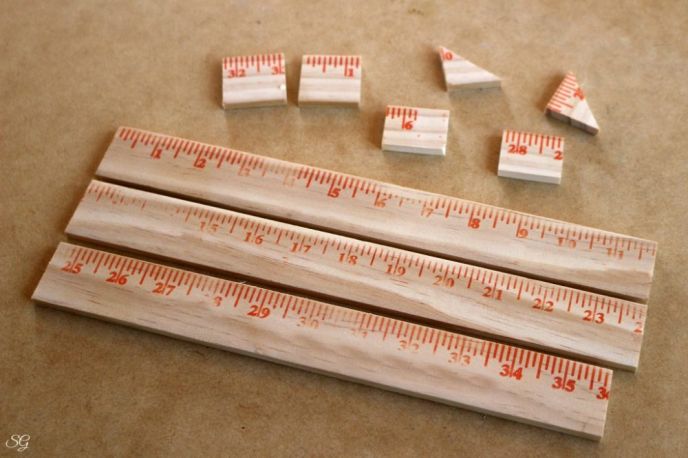
To start this project, I grabbed two yardsticks and cut them down to size. I first lined up the things I know I’ll be storing in my nightstand organizer – my wallet, my phone and, ahem, my Breathe Right® Nasal Strips (we’ll get to that in a bit).

The cuts:
Two 12″ pieces
One 11 ½†piece
Two 1 ¼†x 1 ¼†square piece (width of yardstick, yours may be different)
Two 1 ¼†x 1″ piece (width of yardstick and less depth of yardstick)
One 1 ¼†square cut on a 45 degree angle
 Next, I applied a nice walnut stain and sealer to the wood, making sure to get all of the side and edges of each piece.
 Apply and allow the stain to dry based on the instructions found on the stain container. Once the stain has dried, you’re ready to assemble your new organizer. The picture above shows you the basic layout.
First we’ll glue the end pieces onto either end of the middle piece (1 ¼†x 1 ¼†pieces to the ends of the 11 ½†piece), like this…
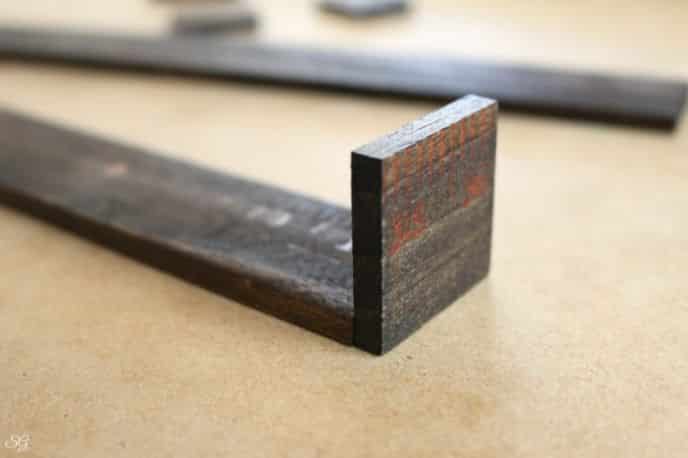 After gluing on both end pieces with heavy duty super glue, you can tip the piece on its side and attach one of the side pieces. Run a slight bead of super glue along the edge and stick the side on.
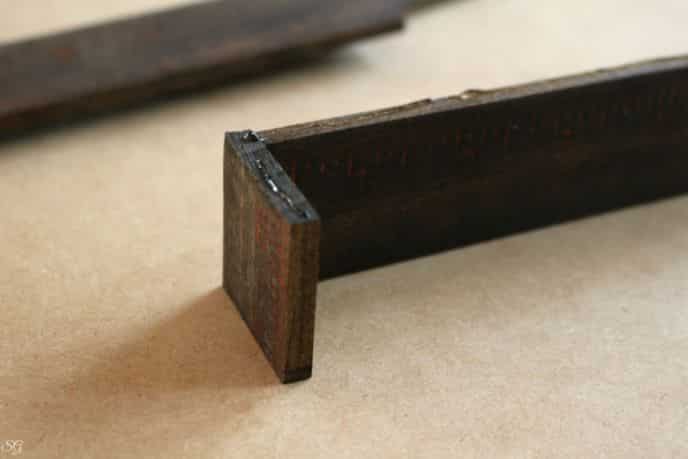 Press and hold the piece in position. This is why I’m using fast-setting glue, so we can assemble this organizer in no time! See how easy this is coming together…
 Glue on the other side, just like you did the first side, to create a three sided box.
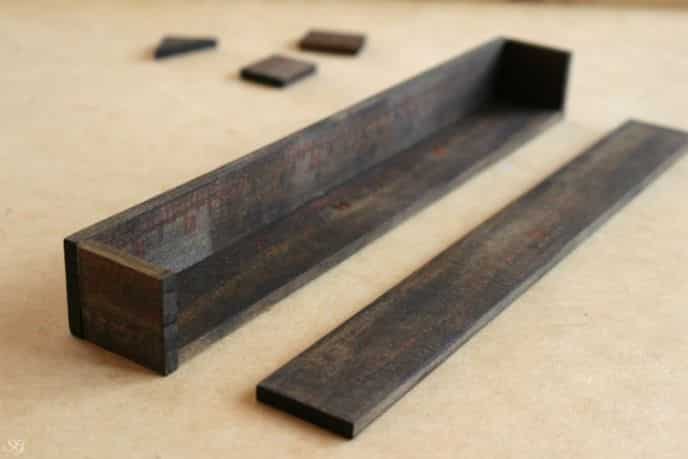
 Like I said, for me I’m storing my wallet, phone and Breathe Right® Nasal Strips, so I measured each accordingly and attached the two spacers according to the size slots I needed, with glue.
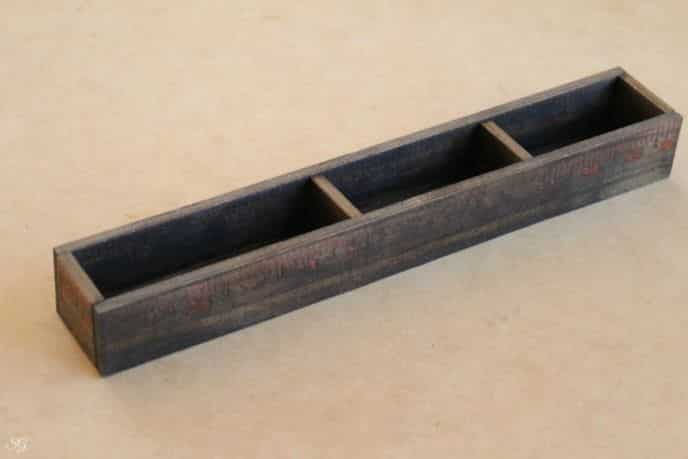 The last step is gluing the 45 degree pieces to the back side of the nightstand organizer. This will make the organizer stable and prevent it from tipping over when we place our items in it. Attach them near the ends or more towards the center – it’s totally up to you.
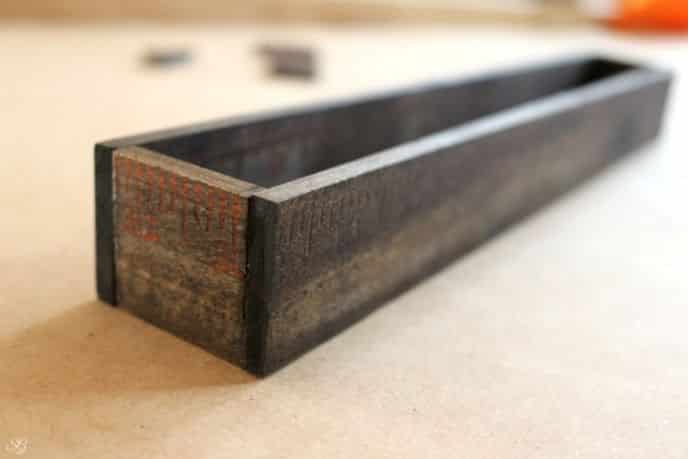
 Okay, now that we have the nightstand organizer built…
 Awesome Pre-made Nightstand Organizers »
I’ll tell you about my Breathe Right Nasal Strips. Katie will be the first to tell you, I get nasal congestion, and it affects her being able to get a good night’s sleep. With her demanding job and school, she definitely needs a good night’s sleep to help ensure she has a great tomorrow!
This is why I do my part and use nasal strips, which come in both tan and clear colors. I use the Breathe Right Extra Tan Nasal Strips. They help both Katie and I both get the sleep we need by combating my nasal congestion.
 Of course the Breathe Right Nasal Strips are drug free and safe to use; you can even use them if you’re using cold or sleep medications. There’s no need to wait for a cold to strike though.
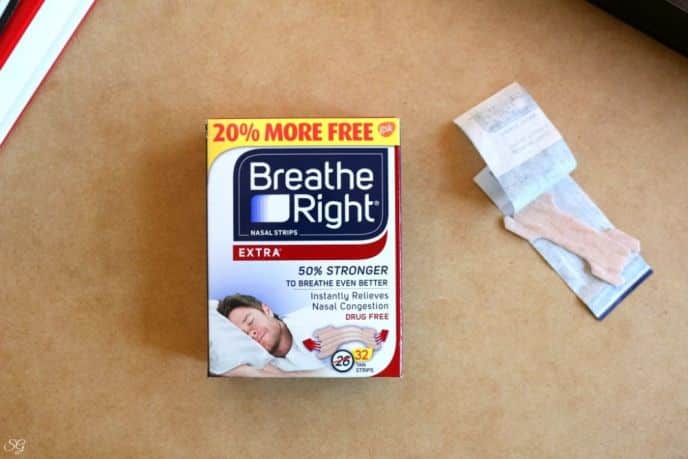
How easy is it to use nasal strips? Simply follow the instructions on the packaging or check out these videos to learn how to apply and remove Breathe Right Nasal Strips. Make sure to apply them to your nose so that the tabs cover your nostrils where they flare out. Once you’ve applied one, rub gently so it adheres for the night. They’re really easy to put on, and in the morning, just wash your face and the nasal strip comes right off – a common mistake by most users. Don’t forget to save $1 when you print a coupon or get a free sample! You can pick them up right in the allergy aisle at Walmart, for the best value everyday.
How do you organize for a better tomorrow?
- Like
- Digg
- Del
- Tumblr
- VKontakte
- Buffer
- Love
- Odnoklassniki
- Meneame
- Blogger
- Amazon
- Yahoo Mail
- Gmail
- AOL
- Newsvine
- HackerNews
- Evernote
- MySpace
- Mail.ru
- Viadeo
- Line
- Comments
- Yummly
- Send in Text
- Viber
- Telegram
- Subscribe
- Skype
- Messenger
- Kakao
- LiveJournal
- Yammer
- Edgar
- Fintel
- Mix
- Instapaper
- Copy Link
Leah, if you do charge your phone at night, you can easily set your phone in the holder upside down… Problem solved. I think this holder is a great idea for my husband. As he sets his stuff down anywhere and it drives me crazy.. Lol. Thanks for sharing your idea.
Thank you Leah. You might be able to fit it on your window sill. You’re right. I don’t charge my phone at night, I charge it in the car mostly. 🙂
Very cute and clever, however, my “night stand” is the window sill next to and under my window unit air conditioner. My wallet lives in my purse… well, my card holder lives in my purse. I guess you never charge your phone over night… you are better organized than I am I guess.