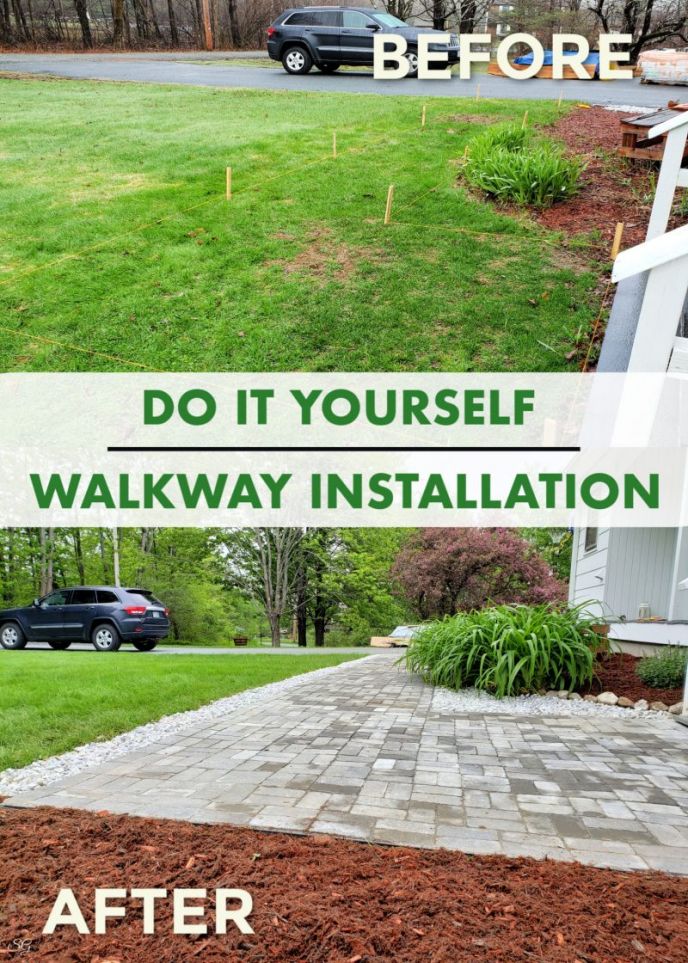
Install a DIY Paver Walkway! For our next big home improvement project, we’re learning how to install a paver walkway. Join us and see what we faced on our DIY project.
The pavers we are using are the concrete type you’ll find at your home improvement store.
Over the course of a few weekends, we installed our own DIY paver walkway. We ran into some challenges that we’ll discuss. But overall – it was a fun project.
As you may recall, we installed our own paver patio. However, today we’re talking about how to install a paver walkway and the challenges and we faced in our particular project.
This is not likely something you’ll run into. But we did end up finding a new and innovative product to remedy our situation. And it cut out a TON OF WORK!
How To Install a DIY Paver Walkway
As you know, we bought a house about five years ago.
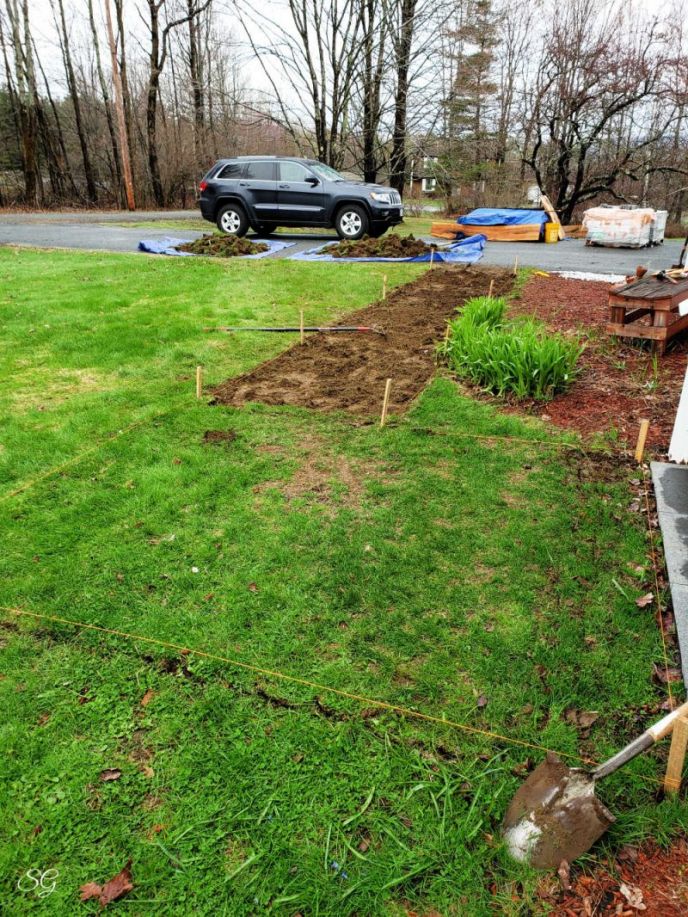
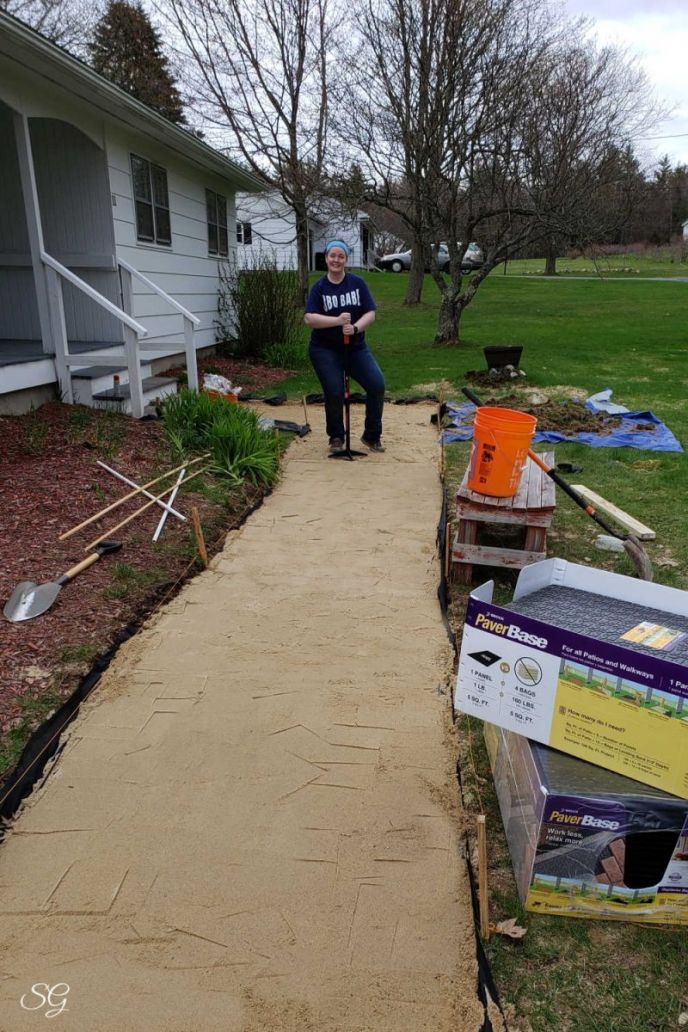
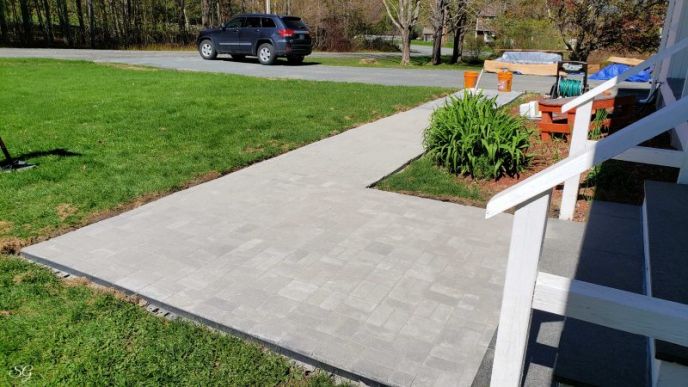
There was no walkway to the front door. And we always found this odd. It was just grass — and the grass always got trampled on and looked hideous.
So, what are we to do? I thought I’d share with you how to install a paver walkway so you can recreate what we’re doing at our home.
Stone Path Under The Grass?
Well, come to find out, there was a walkway there leading to our front door. It was just under the grass.
Apparently a walkway was installed when the house was built, but it sunk in a lot over the years and the grass grew right over it.
Amazing. Now we had a walkway under the grass to contend with.
Our original plan was to dig 8″ down, lay hard pack gravel, sand, then pavers. Because this is how we did it with our paver patio installation.
However, that would mean digging out whatever walkway was there and who knows what mess that would create.
Working Over A Troublesome Area
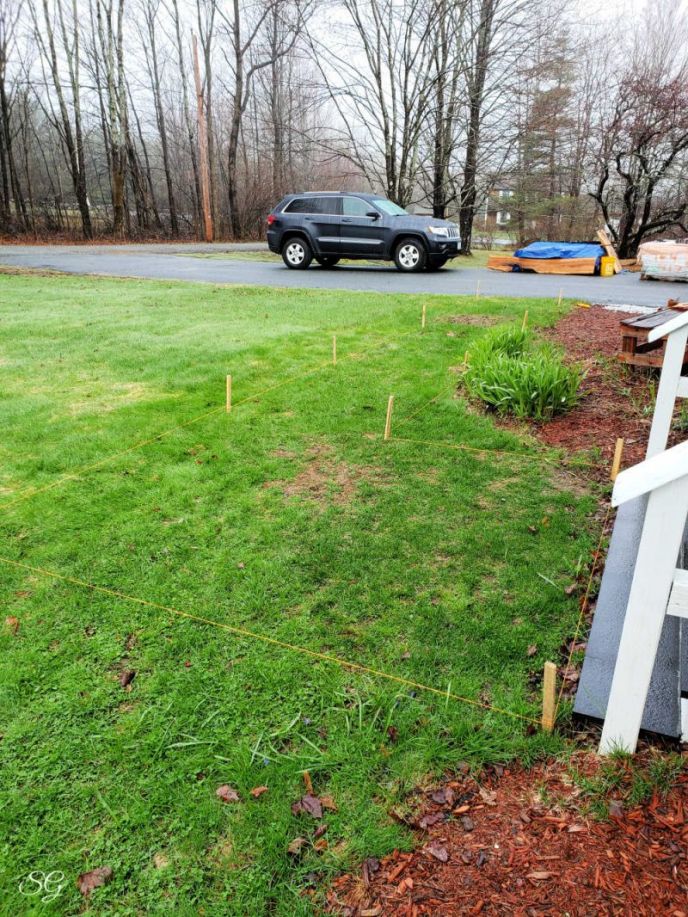
The second challenge we knew about but didn’t realize how close to the surface it would be—It was an old dry well box.
If you see the bare spot in the grass, that’s where there is a concrete box under the grass.

It is much like a septic tank box, but used for greywater from the kitchen.
Nevertheless, it was right there about 3 inches under the ground. And we certainly were not going to remove the dry well. So, we had to get creative.
Paver Base Panels
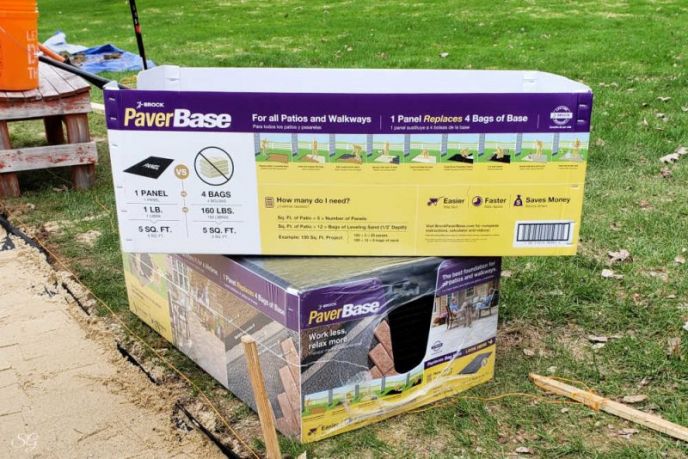
In a combination of window shopping for pavers and browsing online, we found a new and innovative product called Paver Base Panels.
It’s a polyethylene system that interlocks and replaces the need for gravel paver base material.
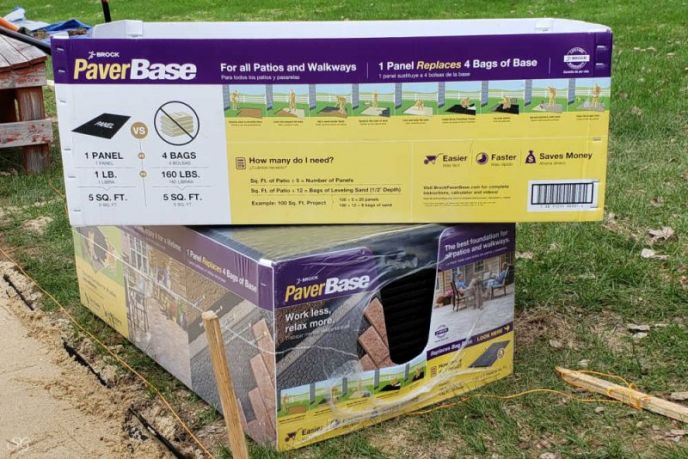
With this product, we only have to dig down about 2 inches. We literally saved hours and hours of digging.
On top of that, we were also relieved of needing 6,000 pounds of gravel base! That means we didn’t need to lug, compact, and level 3 tons of base materials. Amazing! Our backs certainly thanked us for THAT!
Now that we have everything figured out, let’s walk through the paver walkway installation.
Related Projects
Materials
Materials list for how to install a paver walkway.
Other things you’ll need:
Installation
The process is seemingly simple, manual labor is the hard part. Scroll through the installation process and let me know if you have any questions about how to install a paver walkway. I’ll do my best to help you along the way!
If you take your time, plan, and strategically execute each part of the process, you’ll have a beautiful DIY paver walkway in no time!
Dig The Pad
Digging out the area where your walkway is going to go maybe the most difficult part. It was certainly the most labor-intensive for us.
However, we did save a lot of digging by using the polyethylene paver base product. Because we used that product, we only had to dig down a couple of inches rather than 8 to 10 inches! Such a time and labor saver.
To dig out the pad, get your stakes and mason line. Outline the area where you are going to put your walkway. In our case it was 35 feet along the front of the house, coming back 7 feet, up against the stairs.
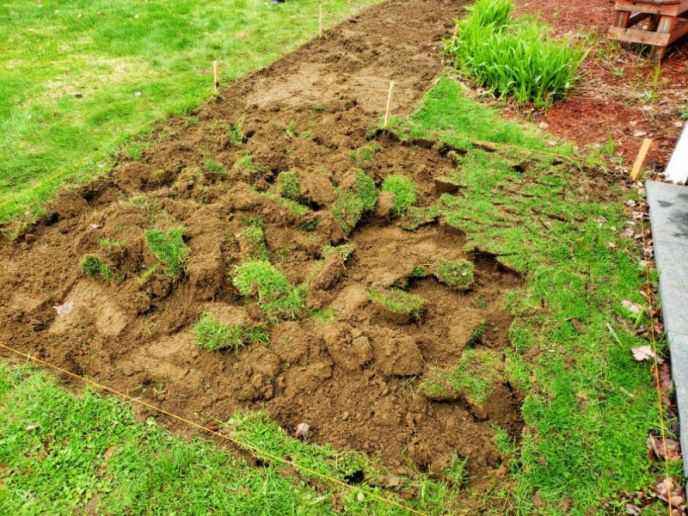
We found it easier to dig the spade into the ground and ‘chip out’ shovel size pieces which were then picked up and carried to the toss pile.
How Deep To Dig
If you’re using the polyethylene paver base as we are, you’ll need to know how deep to dig, right? Here’s the gist of it…
- Measure the thickness of your pavers: 1.75″ is typical
- Account for the Paver Base Panels: 0.75″
- Account for the paver leveling sand: 0.50″
- Total dig out should be 1.75 + 0.75 + 0.50 = 3 inches

Also, keep in mind, you need to include watershed when you’re digging out your walkway area.
Shed The Water
A pitch of 1/4″ per foot, sloping away from your home is needed to properly shed water.
Because this will move the rainwater away from your home rather than up against your foundation.
It’s a critical step in the process, so make sure you do this.
If your paver walkway is 4 feet wide, you’ll have a 1″ drop from one side to the other.
Of course, make sure the water sheds away from your home and foundation. To measure this, place a couple of mason lines, use the line-level to level the line. Then measure from the line to the ground.
The side closer to your home should be shorter than the side furthest from your home by 1/4″ per foot or thereabouts.
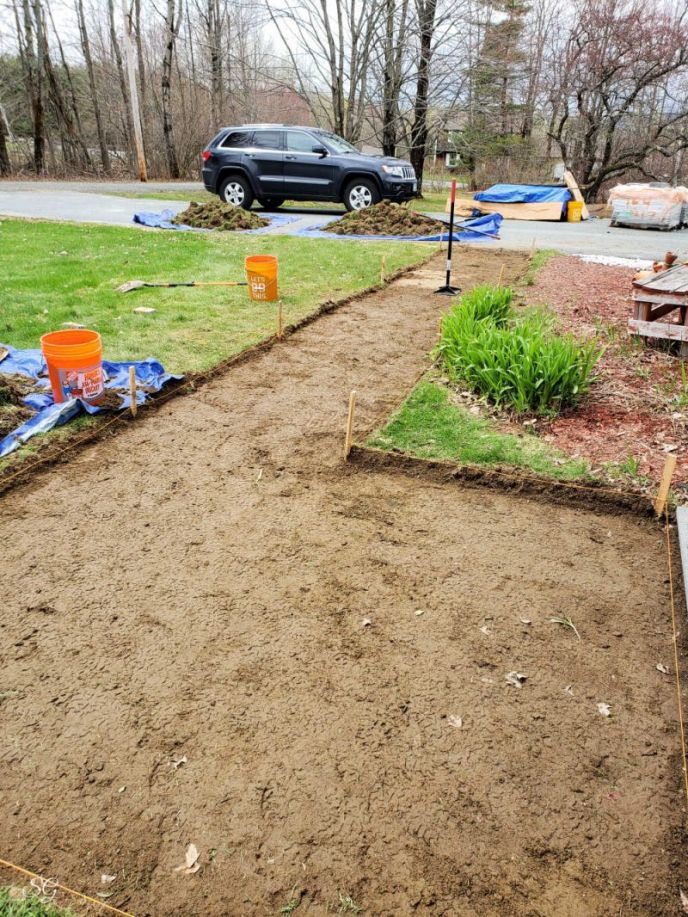
Tamp It Down
Now that you’ve dug out the ground, applied a slight slope, it’s time to compact it!
Tamp down the ground with a hand tamper or one of the tamper machines you rent from the home improvement store.
Make sure to shift the dirt around, keeping the pitch consistent.
You’ll have to shuffle dirt around with the backside of your tined rake, that’s ok. It’s a lot of shuffling, but important for your walkway to come out nicely.
Tamp, tamp and tamp some more.
You can’t compact the ground enough. Go over it several times if you need to!
This is hard work, so maybe enlist a few friends to help with the tamping! It’ll go faster and wear out less quickly.
Always keep in mind that slope away from your home while you’re compacting the ground.
Lay Landscape Fabric
Now that we have our DIY paver walkway leveled, pitched, and tamped down, we can lay down the landscape fabric.
You know how when you’re working out in the hot sun and the air is very still. No breeze at all. THEN the wind picks up violently when you’re doing something that requires zero wind? Yeah. Go ahead, lay down landscape fabric. It’ll be easy they said.
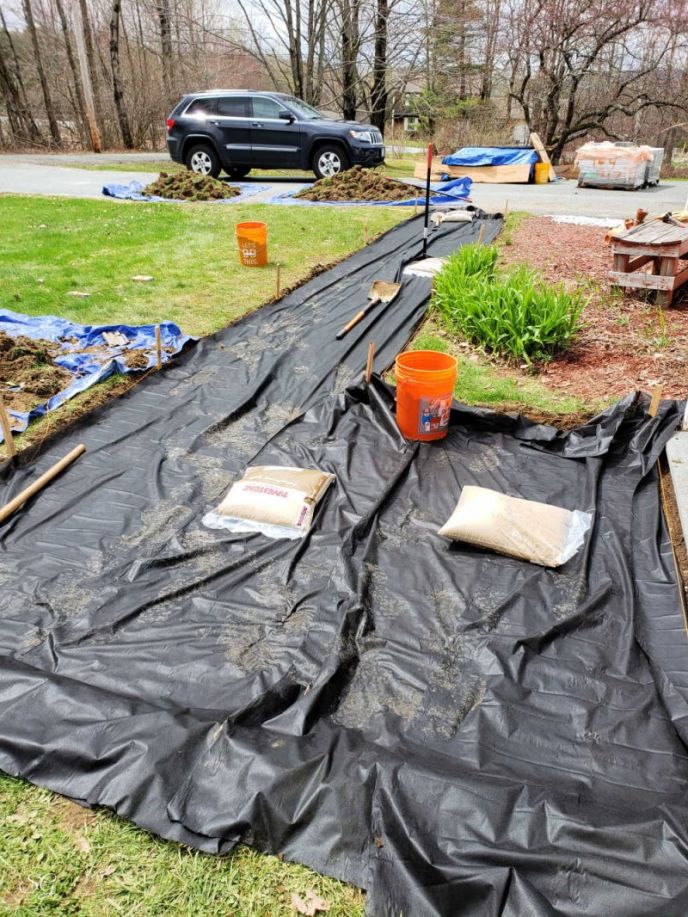
We got a 100-foot roll and put down two layers of it. Wrinkles-shminkles it’s down and whatever wrinkles we couldn’t get out before the sand went down were just left in place.
PS: The landscape fabric is not just to prevent weeds from coming up, but rather hold the sand from sinking into the ground below. So you really want a high-quality fabric for this.
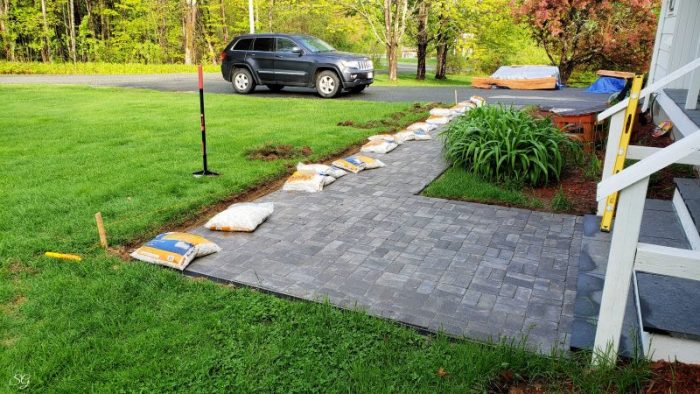
Add Paver Leveling Sand
The paverbase product recommends using 1/4″ to 1/2″ of paver base leveling sand on top of the landscape fabric.
Let me tell you 1/4″ of sand is basically not enough to cover the wrinkles in the fabric, so it is what it is.
For this, we used two pieces of 1/4″ pipe, that gave us the 1/2″ layer of sand (the outside of a 1/4″ pipe is 1/2″ in diameter).
Lay the pipe down on the landscape fabric, add your sand and move it around with a shovel or rake, then use your 2×4 piece to screed the sand level.
When I say level, it will be equal to that of the pitch you created, automatically.
Remove the pipes and fill in the holes left by the pipes with your hands. We found it easy to use a cup to pour the sand into the voids left by the pipes.
Sorry, no picture – I was on my hands and knees gettin’ it done!
Tamp The Sand
You’ll want to tamp the sand as you go. Spread out a section, tamp down. Tamp tamp tamp, not too hard that you displace the sand too much, but hard enough to compact it.
We had a nice system going where one of us would tamp while the other was screeding sand. It went fairly quickly.
After the first round of tamping was done, we went over the entire area again with the tamper to make sure everything was nice and compacted, removing all the first-round tamping lines and compacting every bit of sand that we could.
That being said, we finished tamping from the side of the walkway – you don’t want to walk on the sand after you tamp it down!
Paver Base Panels
Here comes that back saving material we were introduced to, interlocking base pads.
Polyethylene interlocking pads that eliminate the need for tons (literally tons) of gravel paver base hard-pack material.
Saving Time and Labor
If we had used gravel paver base, we would have needed to dig deeper and add 6,000 pounds of hard-pack paver gravel. Woo! These saved us a lot of time and work on our DIY paver walkway.
The panels went in in about 30 to 45 minutes, including cutting them! Definitely worth it!
Installing Paver Base Panels
Installing the first few pieces of the Paver Base Panels was the most daunting. It didn’t seem too sturdy and had me questioning the decision to use them.
However, after we got going, it felt much more sturdy and promising and came out great.
As we went along installing the pavers, we did have to knock a few panels together and readjust them a little bit. But still well worth it.
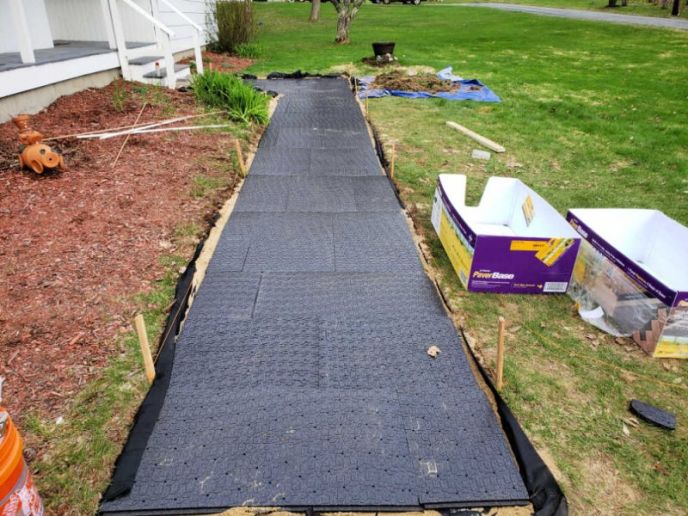
We interlocked the pads, staggering the joints. They lay right on top of the sand and you can walk on the pads once they’re installed.
You’ll likely need to make some cuts. So, to cut the paver base, simply cut along a straight edge, fold over and score cut the backside. It’s much like cutting drywall in that aspect.
Installing Walkway Pavers
This is where all the hard work pays off! Installing the pavers. You’ve done your base, you’ve done your digging, you’re ready to finally install those pavers!
Choosing a Layout
Lay down a few rows to see how you want the pattern. Or if you already know how you want your pattern, dive in and get laying!
We actually laid out a few pavers before we even began digging. That way when we got to this part we’d know exactly what we were going to do.
DIY Paver Walkway Border
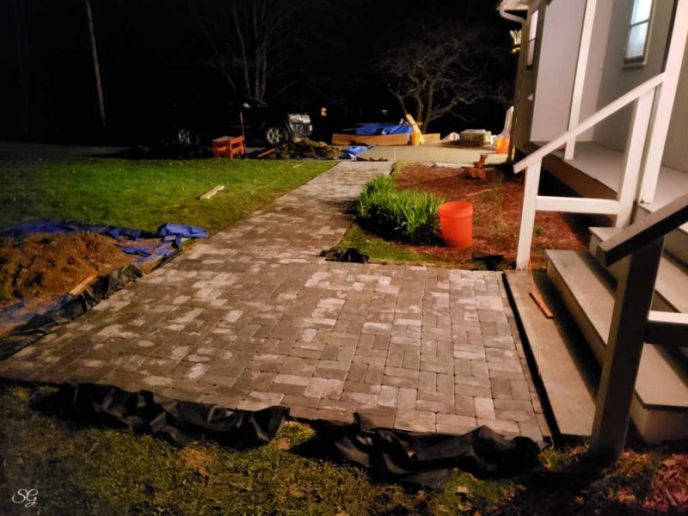
You’ll want to have a border edge, we ran our border with pavers aligned vertically butted up against one another. We then laid a 2 horizontal / 2 vertical pattern all the way up the DIY paver walkway.

Holy crap! What a long day.
Yes, we started at 6am and worked until 9pm when we laid the very last paver!
The job isn’t done at this point, but my wonderful wife and I got all the heavy lifting done in just one day!
I had figured we would need to cut some pavers where the walkways and stairs met, but amazingly, we did not.
Literally, we started at the driveway, laid the pavers and ended up right up against the stairs. We only had to cut one paver to fit at the very end. It worked out well.
How To Cut Pavers
If you do need to cut your pavers, you simply mark them with a pencil, use a hammer and chisel to score all the way around the paver, and keep tapping the score lines with the chisel until it snaps.
Day 1 Complete!
The next day I installed the paver edging. We had rain in the forecast, but I wanted to get the paver edging in place so the pavers didn’t feel the need to wander.
Paver Edging
Now that your pavers are in, it’s time to install the edging installed.
This is also an important step because it will hold your pavers in place over the long-term. It’ll also provide a small gap for the polymeric sand to drop into and lock the pavers in place.

Add edging around all of the outside edges of your pavers. I used my miter saw to cut the paver edging, much easier than a knife or tin snips.
Then, secure the edging with the long paver edging spikes.
It rained off and on for what seemed like forever. It was only a couple of weeks, but it hindered our opportunity to finish.
You see, when installing the paver locking polymeric sand, it must be dry for 24 hours before you spread it into the joints. So it was a waiting game…
Polymeric Paver Walkway Joint Sand
Once the edging is installed, it’s time to add polymeric joint sand.
Use polymeric sand that closely matches the color of your pavers for the best results.
This is different sand than the paver leveling sand. The joint sand contains polymers, or plastics, which harden the sand when water is applied. Almost like concrete so to speak.
Sunny Days
The pavers need to be dry for 24 hours before installing the sand, and for 24 hours after you install the sand. So plan this for some sunny days!

Pour, Broom, Tamp, Repeat
Install the sand (wearing a dust mask) by pouring it onto the pavers and spread it out with a broom.
Using your hand tamper, tamping lightly to work the sand into all of the joints, cracks, and crevices. Tamp, broom, tamp, broom.
Continue this method until all of the joints, cracks, and gaps are filled to the brim. The sand does have 1.75″ deep to go and tamping will help drop the sand down into the gaps.
PS: Don’t forget to fill the joint between the edging and the pavers!
Once you tamp and broom the sand around and the joints between the pavers will no longer take any more sand, you can sweep the remaining sand onto the paver edging.
TIP: Sweep at a 45-degree angle to the joints, much like when you grout tile. This will prevent you from sweeping the sand out of the joints.
Sweep the surface of the off good!
Leaf-Blower The Sand
Carefully use your leaf blower (or borrow your neighbors) to blow the remaining dust off from the surface of the pavers. Do not blow out the sand from between the joints.
This step is to assure that the surface of the pavers are free from polymers, which will discolor the pavers if not cleaned off before the next step.
Water the Polymeric Sand
Aside from finishing touches, this is the final step in this how to install a paver walkway tutorial.
Now that the polymeric sand is in and you’ve swept and blown all the remaining sand and dust off the surface, you can water it in! Polymeric sand is setting sand that becomes hard after it’s been watered.
To water the sand, you’ll use your garden hose on the mist setting. Then, mist the entire surface of the walkway and the polymeric sand, do not make puddles, you’re just misting and allowing the sand to soak up the water.
Wait 15 minutes, and do it again.
You’ll repeat this process 3, 4, or maybe even 5 times, 15-30 minutes apart on a nice warm day. When the sand looks dry, you can do another spray. When the sand stops sucking up the water quickly, it’s done.
You don’t want puddles, you just want to mist it well. If at any point you get puddles, you’re using too much water.
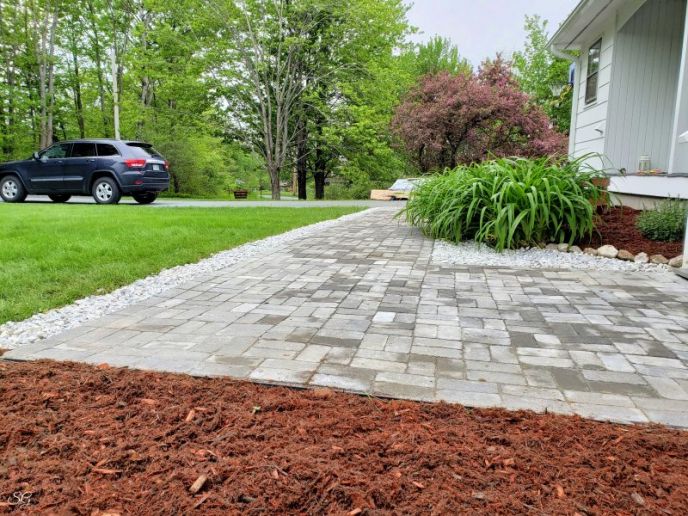
Finish DIY Paver Walkway Decorations
The following weekend we were finally ready to put the finishing touches on your DIY paver walkway.
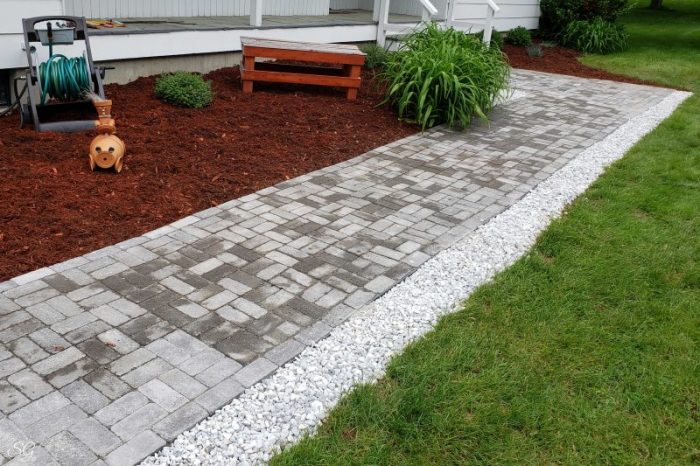
This could mean running a stone border, a mulch border, or even simply backfilling it with the ground you dug up and adding some grass seed. We opted for stone and mulch.
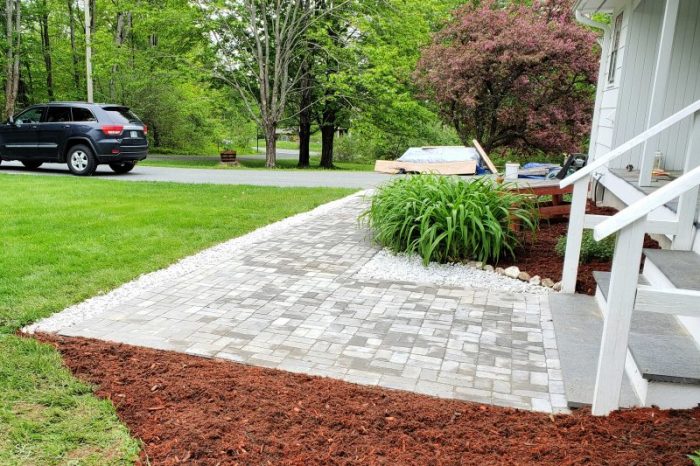
We added marble chip stones to the front of the walkway for the border, and at the end where it’s grass, we carved out and added mulch.
Of course, we cut landscape fabric and installed it (two layers!) under both the stone and the mulch. Hopefully preventing any weeds coming up from the ground.
Yes, that’s my Terracotta Pot Race Car guy still zooming around all these years later. His hair has gone white, but he’s still kickin’. lol

We still need to add a border to the mulched area – we’re thinking football-size stones and are checking craigslist and Facebook market place for anyone giving away rocks.
Until then, we’ll just leave it as is…
This is your home, and your project – finish it however you like!
I hope sharing our DIY walkway experience helps you get started on your own project. Now you know how to install a paver walkway!
While this is how we completed our project, it is your job to consult a professional and assure your project is done right, to code, and all that stuff if you choose to install a walkway of your own.
- Like
- Digg
- Del
- Tumblr
- VKontakte
- Buffer
- Love
- Odnoklassniki
- Meneame
- Blogger
- Amazon
- Yahoo Mail
- Gmail
- AOL
- Newsvine
- HackerNews
- Evernote
- MySpace
- Mail.ru
- Viadeo
- Line
- Comments
- Yummly
- Send in Text
- Viber
- Telegram
- Subscribe
- Skype
- Messenger
- Kakao
- LiveJournal
- Yammer
- Edgar
- Fintel
- Mix
- Instapaper
- Copy Link
Thank you! It was a fun and challenging project for sure. 🙂
Thank you for sharing with the pros and cons added. I like to hear how diys overcame their hiccups and the ways. Great job
Thank you Marilyn! We love it — a lot of hard work but totally worth it in the end!
Wow! Beautiful transformation! You must be very proud every day you look at that walkway! Thank you for sharing such a detailed post! I don’t really have such a project to do, but now I WANT to! Lovely!
Excellent and extremely thorough post! Great job! Will look beautiful for years to come. You all have a beautiful piece of property, what a joy to live there. Thanks for sharing! 🌞