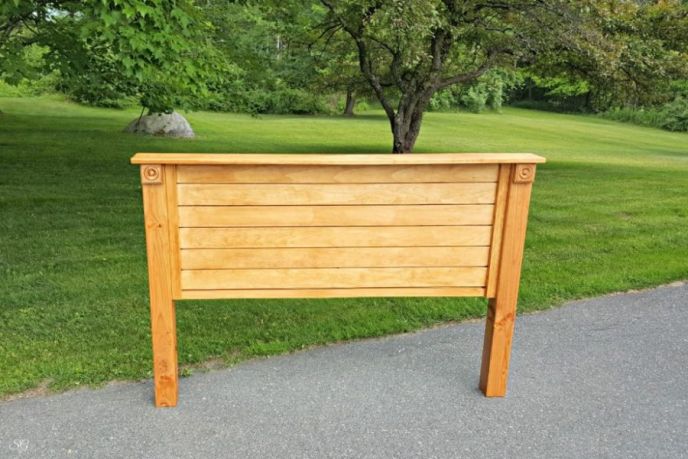
How to build a DIY queen size headboard.
It’s not hard at all. If I can do it, so can you! Let’s build a wood DIY queen size headboard together.
The best part, it’ll only cost around $100 – that’s less expensive than most I’ve found online and definitely less expensive than any I found in-store!

DIY Queen Headboard
Katie and I used to have a platform bed and we liked it.
We bought a new mattress that came with a box spring. The box spring and mattress were too tall up on the platform bed, so we ended up buying this metal bed frame.
The metal frame is a full to king frame, and our bed is a queen that fits perfectly.
The full to king set up means more metal and less creaking. Actually, there’s no creaking with that metal frame, and I’m notorious for being an acrobat when I roll over in bed. lol
Then the hunt was on for a headboard we liked, that fit in our bedroom below the window that is above our bed. Easier said than done!
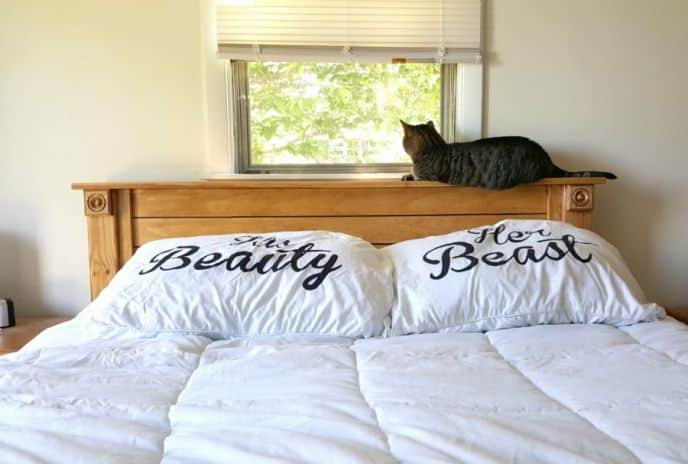
We wanted something with a flat top so Turbo, our cat, would be able to sit and look out the window. Nothing fabric since he’s got claws and would be up there all the time scratching it all to hell.
Everyone needs something different, and maybe an off the shelf headboard from Amazon will work for you. Maybe you’d rather DIY a headboard and know that you built it with your own two hands.
Click here to shop Headboards at Amazon
Finding A Headboard
We looked for a headboard just about everywhere, including online where we ordered one that listed dimensions that should have fit, but the dimensions were switched – the headboard was 54†tall, not 45†as the listing stated. Someone made a typo in the listing.
Anyways, after six months of headboard hunting, I finally decided to build a DIY headboard. I know a DIY guy who took that long to build a headboard? Ha! Anyways, it’s done and it’s beautiful!
The first thing we’ll need to do is grab our materials.
We ordered the lumber and then picked it up at Home Depot. The 1″ lumber are pine boards. I chose to get the grade with the least knots. It was slightly more expensive but worth it for the outcome of the headboard.
The 4×4 is nothing special, just a regular 4×4 they picked out for us to pick up.
Yes, I know they have other carts better suited for lumber, but Katie hates them and blah blah blah. Happy Wife Happy Life. 🙂
Anyway, the cart below is all the lumber it took to build our headboard. Now let’s get to the process!

How To Build A Headboard
If you’re going to build your own, here are the instructions on how to build a headboard. Let’s get to the material list, cuts, and assembly of the queen size DIY headboard!
Materials:
- 1 – 8’ 4×4
- 1 – 6’ 1×6
- 7 – 6’ 1×4
- 2 – 8’ 1×2
- Decorative embellishments
- 3/8†wood plugs and countersink drill bit
- 1 ¼†wood screws (I like SPAX screws because they reduce the chances of splitting the wood)
- 1 ¼†brad nails to go in your Ryobi Brad Nail Gun (use whatever finish nailer you have)
- 3†wood screws (again I like SPAX – but whatever you have in your shop is fine)
- 150 and 220 grit sandpaper and/or sanding blocks
- Stain or Paint and Polycrylic in a satin finish
You may also want to use clamps, orbital sander, speed square to help make your cuts, miter saw, brad nailer, countersink bits.
Again, you can grab a headboard here on Amazon if building one isn’t your thing!
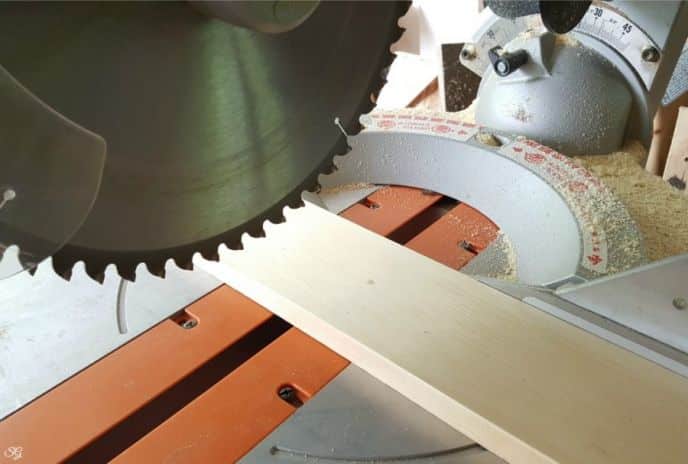
The cuts:
- 8’ 4×4 – cut into two 44†long pieces (posts)
- 6’ 1×6 – cut to 64 ½†long (top of headboard)
- 6’ 1×4 – cut six of the pieces down to 54 ¼†lengths (slats)
- Cut one of the pieces down to three 24†pieces (supports)
- 8’ 1×2 – cut into four 24†pieces (slat supports)
Once all cuts are made, lay everything out for a dry fit. Place your 4×4 legs on the table, or ground if you don’t have large enough tables.
Place the 1×6 across the top to form the top of the headboard. Place two of the 1x2s along the inside edge. Place the 1x4s as slats across the 1x2s. Add the final two 1x2s on top of the slat boards.

Now you should see how this is going to come together. That means we’re on to assembly!
DIY Headboard Assembly
For each board, except for the slats and backside supports, you’re going to drill pilot holes with the countersink bit, apply wood glue to the connecting edges, and then screw the pieces together.
Pro Tip: Use a wet towel to wipe up any excess wood glue before it dries.
Drill three pilot holes in each one of the 1x2s, evenly spaced apart. Drill the holes on the 1†edge so you’re drilling through the entire width of the board. (see final slat assembly photo below)
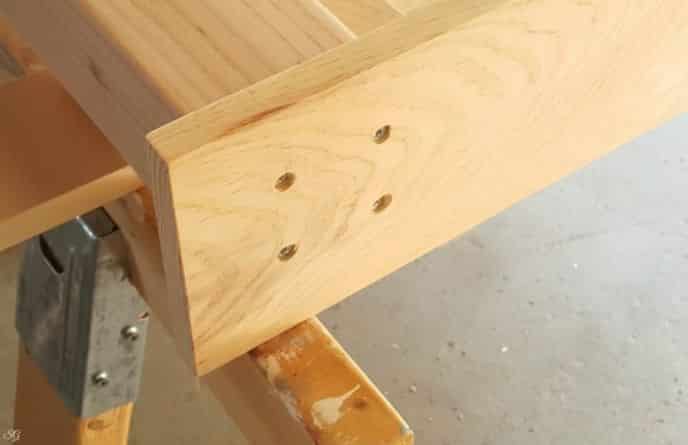
Supports to Posts
Approximately 1 inch from the edge, attach one 1×2 to the 4×4 at the end you wish to be the top of the headboard running the length of the 4×4. Attach using wood glue and 3-inch screws.
Use another 1†piece of wood as a spacer if need be. Make the end flush so top of the post so the top of the headboard will sit on both the 4×4 and the 1×2.
- Flush with end of 4×4 post
- 1†from back of post (use another 1†board as a spacer)
Repeat for a second 1×2 on the other 4×4.
DIY Headboard Top
Leaving 55 ½†between the 4×4 posts, an even overhand on each end and 1†overhang on the back of the posts, attach the headboard top piece to the top of each post using four 3-inch screws in a square pattern and wood glue.
- 55 ½†between posts
- Even over hang on each end
- 1†overhang on back (use 1†board for spacer)
Tip: Dry fit a couple of slats at this point as well to make sure they fit across and rest on the 1x2s we screwed to the 4×4 posts. Use a square to line things up if needed.
Slats and Supports
Once the top of the headboard is attached, use a square, wood glue, and your brad nailer with 1 ¼†nails to attach the slats to the 1x2s that are already attached to the post. Use a screw to space the slats slightly apart if you wish.
Once the slats are in place and everything looks good and square, we can attach the final 1×2 pieces.
To do this, apply wood glue to the slats at the ends, a bead along the edge of the 1×2 opposite the countersink holes. Place the 1×2 on the slats and screw it to the post with 3-inch screws.

Securing Wood Slats
Attach the final three 24†1×4 supports we cut earlier to the back side of the slats (the side we left only a 1†overhang on the top of the headboard/post). I actually had some decorative 1 ¼“ screws from another project so I used those.
You’ll also notice my pieces are a little short – I cut some blocks off to be used on another project too – shhhh 😉
Place one in the middle and one centered between the middle and each end. Glue and screw!

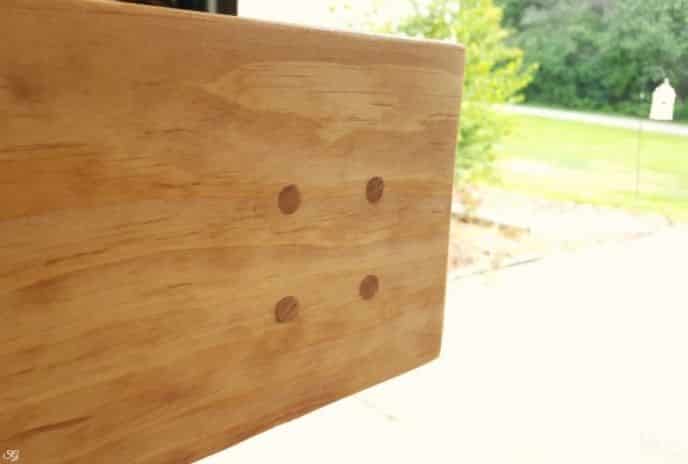
Inserting Wood Plugs
The next step in our DIY headboard is to put the wood plugs in the holes! Put a dab of wood glue on the wooden plugs and place them in the holes. Tap them in very lightly with a hammer.
They should sit flush if you used the countersink bit correctly. The wood plugs really do make the piece look finished.
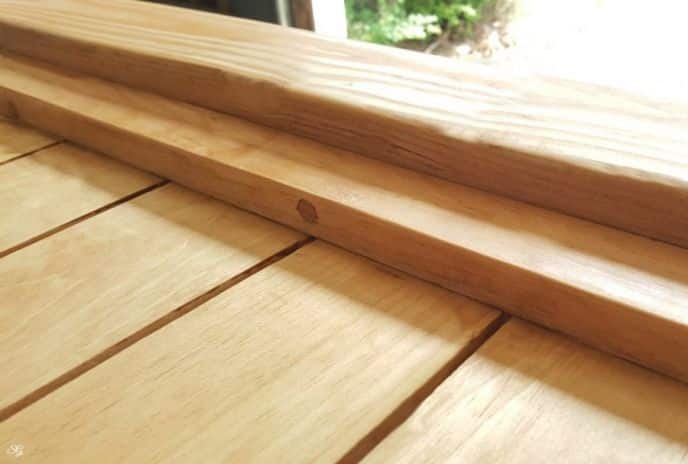
If they stick out a little bit, no worries. We can sand them flush.
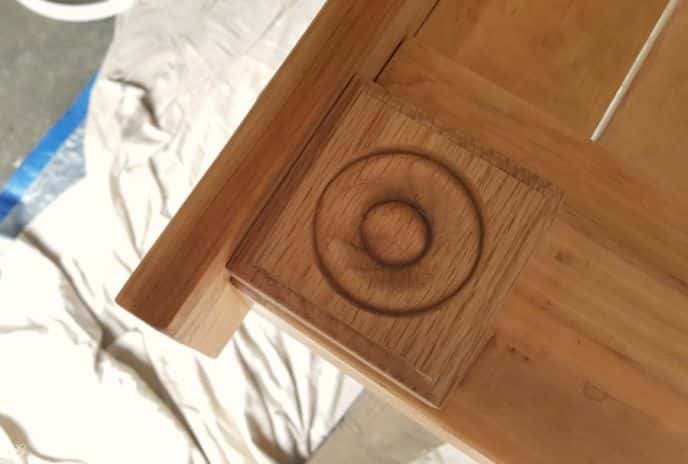
Attach Embellishments – How To Build A Headboard
On the front of the posts (with side with the larger overhang) glue and clamp the embellishments in place snug up against the top of the headboard. Clamp it in place until the glue is completely dry.
 Break Time!
Now that everything is screwed and glued, stop and cook yourself some ribs on the BBQ. You deserve a break. You’ll want to let the plugs dry before sanding, otherwise, they may pop out on you from the vibration of your orbital sander.
….
….
Welcome back! How was the BBQ? 😊
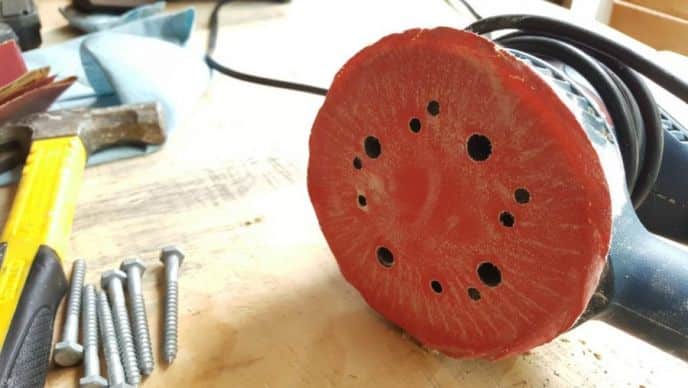
After the wood plugs are in there solid and the embellishments are glued on, we can go ahead and sand the entire headboard!
Use 150-grit sandpaper on your orbital sander to sand off all the rough edges, splinters, and sand your wood plugs down flush.
Use a 150-grit sanding block or sandpaper to get into all the crevices and corners. Hand sand everything if you don’t have an electric sander of course.
Use 220-grit sandpaper to finish the job and make everything nice and smooth.
Tip: If your wood plugs are sitting too high above the surface, use a flush-cut trim saw to get them down closer to the surface before sanding… Or just sand the piss out of them. lol
Stain the DIY Queen Headboard
The color you use to finish your headboard is completely up to you. Matching our bedroom set was important, but of course, you can stain or even paint your headboard to blend with your décor.
I used a 50/50 mix of Varathane Cherry and Varathane Summer Oak colors.
It matches our bedroom set pretty well if I do say so myself. Yep, almost completely by accident after I gave up on test samples of wood and could not for the life of me get a match lol.

I applied two coats of stain for good measure.
Apply Hard Finish
It’s a good idea to apply a hard finish after the stain has completely dried. Read the instructions for dry times. Polycrylic does not yellow over time like Polyurethane.
I applied three coats of Polycrylic to our DIY queen headboard, sanding lightly between coats.

Now how you attach it to your bed frame is up to you. You can just use the three-inch wood screws and a couple of washers. You can get lag bolts and use those to attach your frame to the headboard.
Use through-bolts and wingnuts if you’d like. It’s totally up to you.
I like the lag bolts as you just predrill a hole smaller than the bolt and wrench the bolts in – you’re done! The screws would also work as these are 4×4 posts so they’re really chunky and sturdy and make for a rugged and sturdy headboard.
…..and Turbo is a happy camper!
I hope this article was helpful and taught your how to build a headboard of your own!

- Like
- Digg
- Del
- Tumblr
- VKontakte
- Buffer
- Love
- Odnoklassniki
- Meneame
- Blogger
- Amazon
- Yahoo Mail
- Gmail
- AOL
- Newsvine
- HackerNews
- Evernote
- MySpace
- Mail.ru
- Viadeo
- Line
- Comments
- Yummly
- Send in Text
- Viber
- Telegram
- Subscribe
- Skype
- Messenger
- Kakao
- LiveJournal
- Yammer
- Edgar
- Fintel
- Mix
- Instapaper
- Copy Link
I AM going to make this love bboard,shiplap. The head board!!! LUV LUV LUV it how about planters flower beds in small yards