Hey yall, it’s time to get out the pallet wood and build an easy coat rack! You can hang this one on the wall in your hallway, breezeway, mud room, garage – heck hang it where ever you want to! This DIY pallet wood coat rack should only take you 15 minute to toss together, not including the paint dry time, if you choose to paint it.

DIY Pallet Wood Coat Rack
Materials
- Wide pallet board(s)
- Wood Glue
- 3/4″ Brad Nails
- Chalk Paint
- Coat Hooks
Cuts
- Three 16″ pallet boards
- Two 13″ pallet boards (may be different for your project – see note)
How To Build A Pallet Wood Coat Rack
Begin by cutting your pallet boards to length, three at about 16″ and two at about 13″. Once they’re cut, you can lay them on your work bench to configure them. Using the three 16″ boards, I’m going to create a staggered look. The 13″ boards will be the braces on the back of the coat rack to hold everything together.

Now that I know the layout I want to use, I’m going to flip the boards over so the side I wish to be on the face of the coat rack is on the workbench.

Glue the 13″ pieces across the back of the boards…
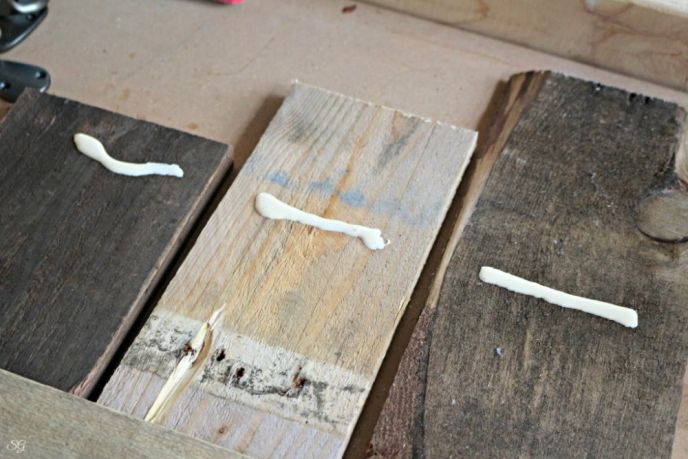
…and then secure them with brad nails.
I love and highly recommend a cordless brad nailer!
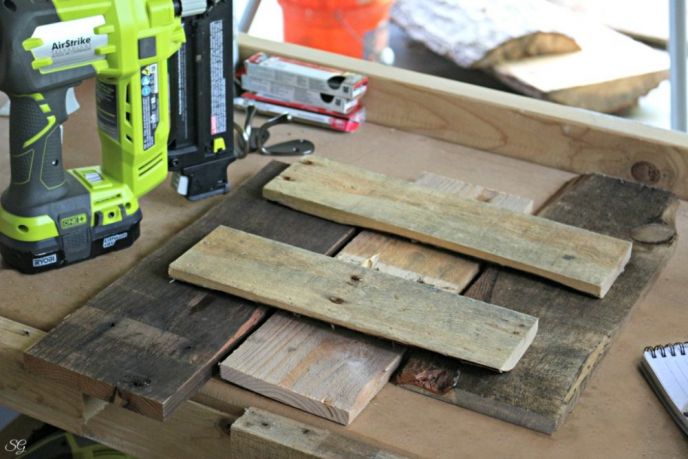 NOTE: Your braces may be more or less than 13 inches. Measure the width of all three boards and then deduct a couple of inches. See how the boards split the difference and don’t reach the edge boards in the image above? That’s what you’re looking for.
Now you can hew the edges with a utility knife and sand the entire piece, front and back, with an orbital sander. I use 80 grit, which is very worn now – so anything between 80 and 150 grit will work. You just want to sand off the burrs and make sure there will be no splintering when you give it as a gift, or hang it in your home.

After you’re done sanding and removing and splintery edged, it’s time to put a finish on.
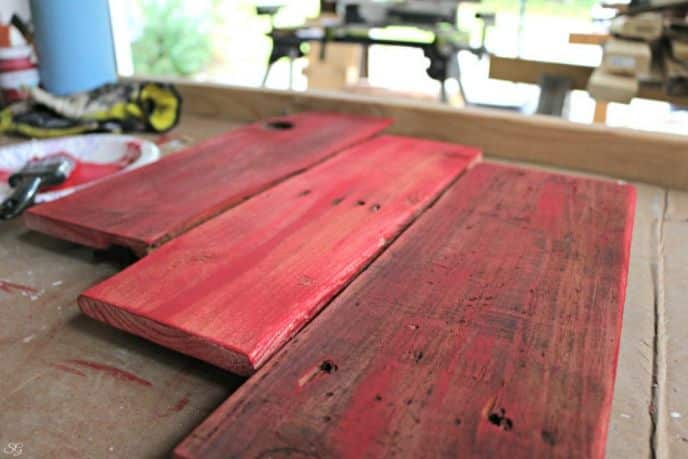
For this one, I’m using red chalk paint and using the dry brush technique. This makes it look a little rustic, a little old barn-boardy and kinda cool at the same time. Some people like to slather the paint on then grind it off with a sander to get this effect. You can achieve that same type of look with a dry brush, and use a lot less paint, too!
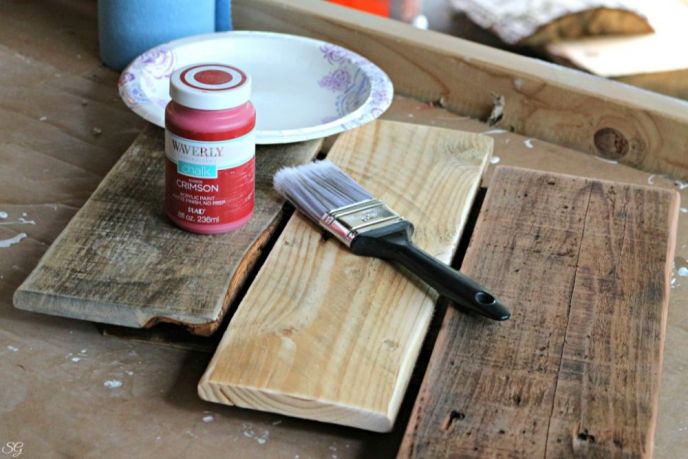
All we’ll need for this DIY coat rack is about a quarter size dollop of paint. Put it on a paper plate, dab the corner of your brush in it, dab the paint off on the plate and lightly brush your way to a rustic look!
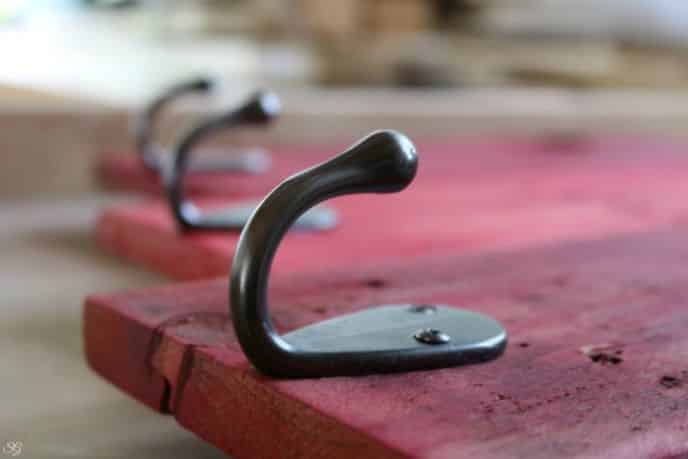
Next, attach your hooks! I like to place my hooks where I want them, mark the holes and drill out pilot holes. Use a bit that is just smaller than the screws that come with your coat hooks.

Then apply a bead of liquid nail on the back of the hook…

…and then screw it into place.

Drill anchor holes between the boards through the top back brace. Anchor the coat rack to the wall using proper wall anchors. I prefer to use toggle bolt wall anchors because they go into the wall and hang onto the back side of the sheetrock. They’re the best for hanging heavy things, like winter coats and such.
So, what do you think? Easy as pie, right?

I hope this tutorial helps you build a DIY pallet coat rack!
- Like
- Digg
- Del
- Tumblr
- VKontakte
- Buffer
- Love
- Odnoklassniki
- Meneame
- Blogger
- Amazon
- Yahoo Mail
- Gmail
- AOL
- Newsvine
- HackerNews
- Evernote
- MySpace
- Mail.ru
- Viadeo
- Line
- Comments
- Yummly
- Send in Text
- Viber
- Telegram
- Subscribe
- Skype
- Messenger
- Kakao
- LiveJournal
- Yammer
- Edgar
- Fintel
- Mix
- Instapaper
- Copy Link